Kia Cee'd: Audio / Audio Unit Repair procedures
| • |
Take care not to scratch the center fascia panel and related
parts.
|
| • |
Eject all the disc before removing the audio unit to prevent
damaging the CD player's load mechanism.
|
|
| • |
When prying with a flat-tip screwdriver, wrap it with protective
tape, and apply protective tape around the related parts, to
prevent damage.
|
| • |
Take care not to scratch the body surface.
|
| • |
Put on gloves to protect your hands.
|
|
| 1. |
Disconnect the negative (-) battery terminal.
|
| 2. |
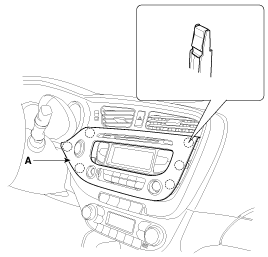
Using a screwdriver or remover, remove the center fascia panel (A).
|
| 3. |
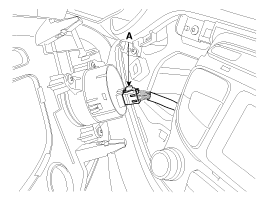
Disconnect the start/stop button connector (A).
|
| 4. |
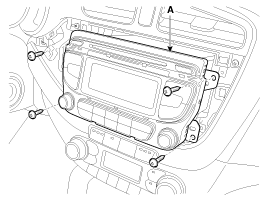
Loosen the mounting screws (4EA).
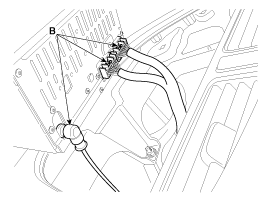
Remove the audio assembly (A) after disconnecting the connectors and
cables (B).
|
If the CD does not eject, do not attempt to remove it because
the audio unit may be damaged.Contact an authorized dealership
for assistance.
|
|
| 1. |
Connect the connectors and cables.
|
| 2. |
Install the audio assembly.
|
| 3. |
Install the center fascia panel.
|
| 4. |
Connect the negative (-) battery terminal.
|
Make sure the audio head unit connectors are plugged in properly
and the antenna cable is connected properly.
|
|
Inspection
1.
Troubleshooting for Speaker
(1)
Basic inspection of speaker
Inspect the sound from speaker after verifying ...


 Audio Unit Components and components location
 Speakers Repair procedures