Kia Cee'd: Crash Pad / Cluster Fascia Panel Repair procedures
Kia Cee'd JD Service Manual / Body (Interior and Exterior) / Crash Pad / Cluster Fascia Panel Repair procedures
| Replacement |
|
|
| 1. |
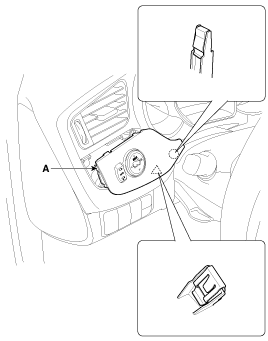
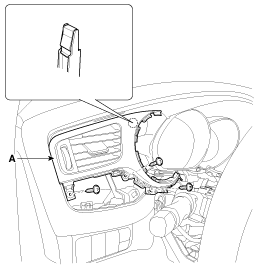
Using a screwdriver or remover, remove the crash pad garnish [LH] (A).
|
| 2. |
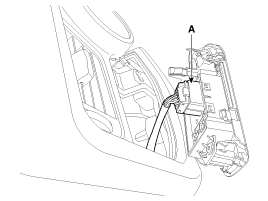
Disconnect the power door mirror switch connector (A).
|
| 3. |
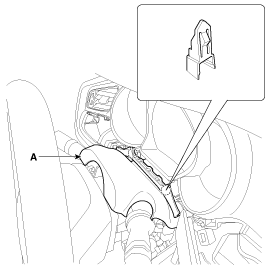
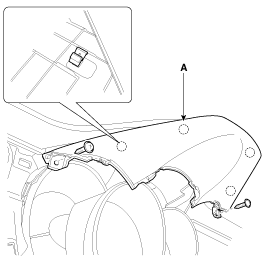
Using a screwdriver or remover, remove the steering column upper shroud
panel (A).
|
| 4. |
Using a screwdriver or remover, remove the cluster fascia cylinder panel
(A).
|
| 5. |
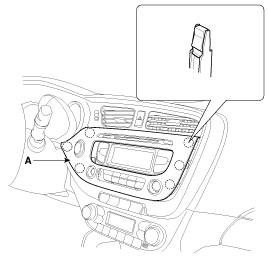
Using a screwdriver or remover, remove the center fascia panel (A).
|
| 6. |
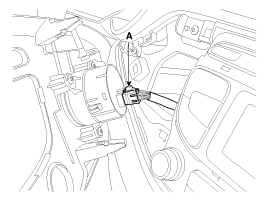
Disconnect the start/stop button connector (A).
|
| 7. |
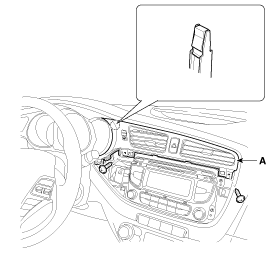
After loosening the mounting screws, then remove the center airvent
duct (A).
|
| 8. |
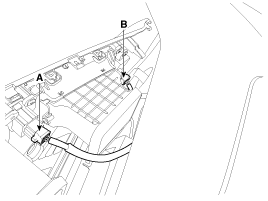
Disconnect the hazard switch connector (A) and trip switch connector
(B).
|
| 9. |
After loosening the mounting screws, then remove the side airvent duct
[LH] (A).
|
| 10. |
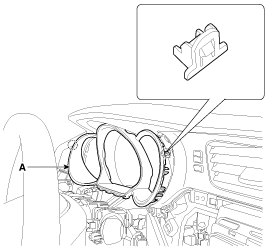
After loosening the mounting screws, then remove the cluster fascia
upper panel (A).
|
| 11. |
Install in the reverse order of removal.
|
 Cluster Fascia Panel Components and components location
Component Location
1. Cluster fascia panel
...
 Center Fascia Panel Components and components location
Component Location
1. Center fascia panel
...
Other information:
Kia Cee'd JD Owners Manual: Static bending light
While driving the corner, for your sight
and safety, the static bending light turns
on automatically. The system will operate
automatically as follows:
When vehicle speed is under 10km/h
and steering wheel angle approximately
80 degrees.
When vehicle speed is over 10km/h
and ste ...
Kia Cee'd JD Service Manual: Center Fascia Panel Repair procedures
Replacement
•
When prying with a flat-tip screwdriver, wrap it with protective
tape, and apply protective tape around the related parts, to
prevent damage.
...


