Kia Cee'd: Panoramaroof / Panoramaroof Assembly Repair procedures
| Replacement |
| 1. |
Remove the roof trim.
(Refer to Roof Trim - "Roof Trim Assembly")
|
| 2. |
Remove the roof antenna.
|
| 3. |
Remove the movable glass.
(Refer to Panoramaroof - "Movable Glass")
|
| 4. |
Remove the panoramaroof deflector.
(Refer to Panoramaroof - "Panoramaroof Deflector")
|
| 5. |
Remove the roof garnish.
(Refer to Body Side Molding - "Roof Garnish")
|
| 6. |
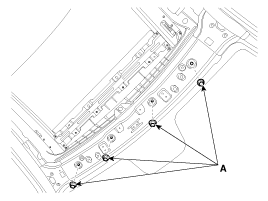
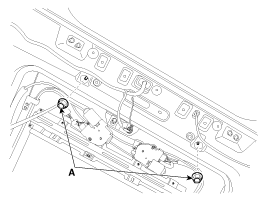
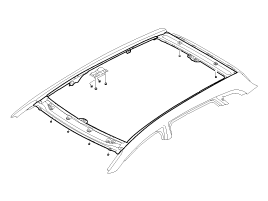
Loosen the panoramaroof mounting nuts (A).
[Front]
[Rear]
|
| 7. |
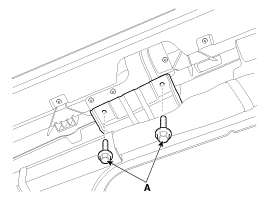
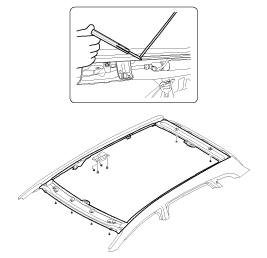
Loosen the panoramaroof side mounting bolts (A).
|
| 8. |
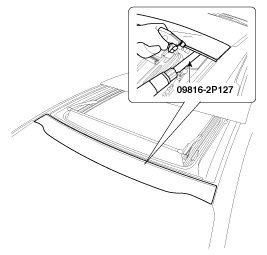
Open the space between chassis and front glass using flathead screwdriver,
and then cut the sealant of rear and side using a tool (09816-2P127).
|
| 9. |
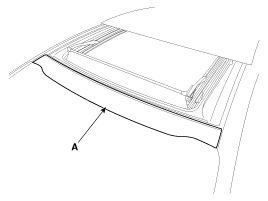
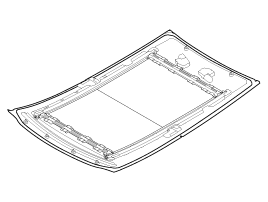
Remove the front glass (A).
|
| 10. |
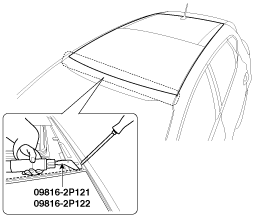
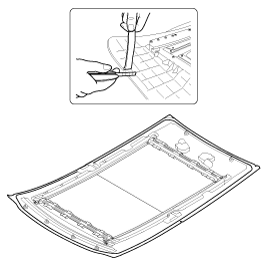
Open the space between chassis and sunroof using flathead screwdriver,
and then cut the sealant of front using a tool (09816-2P121, 09816-2P122).
|
| 11. |
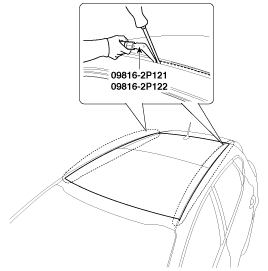
Open the space between chassis and sunroof using flathead screwdriver,
and then cut the sealant of aside using a tool (09816-2P121, 09816-2P122).
|
| 12. |
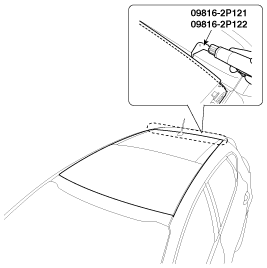
Open the space between chassis and sunroof using flathead screwdriver,
and then cut the sealant of rear using a tool (09816-2P121, 09816-2P122).
|
| 13. |
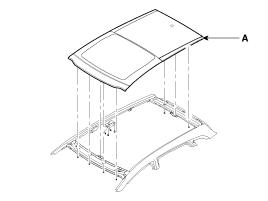
Cut the tape between the panoramaroof and the body. remove the panoramaroof
(A).
|
| 1. |
\With a knife, scrape the old adhesive smooth to a thickness of about
2mm (0.08 in.) on the bonding surface around the entire panoramaroof
opening flange.
|
| 2. |
Clean the body bonding surface with a sponge dampened in alcohol. After
cleaning, keep oil, grease and water from getting on the clean surface.
|
| 3. |
With a sponge, apply a light coat of body primer to the original adhesive
remaining around the windshield opening flange. Let the body primer
dry for at least 10 minutes :
|
| 4. |
Apply a light coat of glass primer to the outside of the fasteners.
|
| 5. |
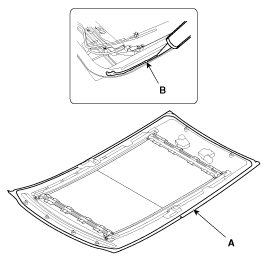
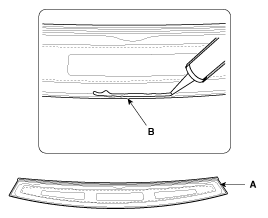
Pack adhesive into the cartridge without air pockets to ensure continuous
delivery. Put the cartridge in a caulking gun, and run a bead of sealant
(B) around the edge of the panoramaroof (A) as shown. Apply the adhesive
within 30 minutes after applying the glass primer. Make a slightly thicker
bead at each corner.
|
| 6. |
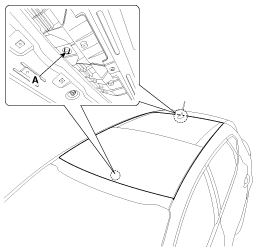
Fix the panoramaroof to center hall (A) of body, carefully install the
panoramaroof to the body frame.
|
| 7. |
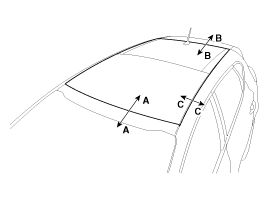
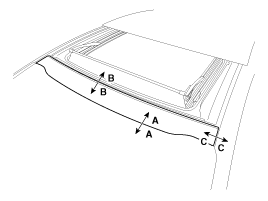
Check the Clearance and gap for each side after installing the panoramaroof.
|
||||||||||||||||||||||
| 8. |
Install the nuts (A) to the panoramaroof.
[Front]
[Rear]
|
| 9. |
Install the bolts (A).
|
| 10. |
Install the movable glass.
|
| 11. |
Open the movable glass fully.
|
| 12. |
Pack adhesive into the cartridge without air pockets to ensure continuous
delivery. Put the cartridge in a caulking gun, and run a bead of sealant
(B) around the edge of the front glass (A) as shown. Apply the adhesive
within 30 minutes after applying the glass primer. Make a slightly thicker
bead at each corner.
|
| 13. |
Install the front glass (A).
|
| 14. |
Install the roof garnish.
|
| 15. |
Install the panoramaroof deflector.
|
| 16. |
Close the movable glass fully.
|
| 17. |
Check the Clearance and gap for each side after installing the front
glass (A).
|
||||||||||||||||||||||
| 18. |
Install the roof antenna.
|
| 19. |
Scrape or wipe the excess adhesive off with a putty knife or towel.
To remove adhesive from a painted surface or the windshield, wipe with
a soft shop towel dampened with alcohol.
|
| 20. |
Let the adhesive dry for at least one hour, then spray water over the
roof and check for leaks. If a leak occurs, let it dry, then seal with
sealant :
|
| 21. |
Reinstall all remaining removed parts. Install the rearview mirror after
the adhesive has dried thoroughly. Advise the customer not to do the
following things for two the three days :
|
| 22. |
Install the roof trim.
|
 Panoramaroof Assembly Components and components location
Component Location
1. Panoramaroof assembly
...
 Mirror
...
Other information:
Kia Cee'd JD Owners Manual: Rear combination light bulb replacement
(1) Rear turn signal light
(2) Stop/tail light
(3) Back-up light
(for 3 Door and 5 Door)
(4) Tail light or stop/tail light
(for LED type)
(5) Rear fog light (for 5 Door), Rear fog
light (Driver’s side) or back-up light
(Passenger’s side), (for wagon)
(6) Rear fog light (for 3 Do ...
Kia Cee'd JD Owners Manual: Manual transaxle shift indicator
This indicator informs you which gear is
desired while driving to save fuel.
For example
: Indicates that shifting up to
the 3rd
gear is desired (currently the shift
lever is in the 2nd or 1st gear).
: Indicates that shifting down to
the
3rd gear is desired (currently the
shift l ...

