Kia Cee'd: Interior Trim / Rear Wheel House Trim Repair procedures
| • |
Put on gloves to protect your hands.
|
|
| • |
Use a plastic panel removal tool to remove interior trim pieces
to protect from marring the surface.
|
| • |
Take care not to bend or scratch the trim and panels.
|
|
| 1. |
Remove the rear seat assembly.
(Refer to Rear Seat - "Rear Seat Assembly")
|
| 2. |
Remove the rear shelf side trim.
(Refer to Interior Trim - "Rear Shelf Side Trim")
|
| 3. |
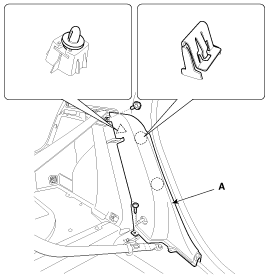
After loosening the mounting bolt and screw, then remove the rear wheel
house trim (A).

|
| 4. |
Install in the reverse order of removal.
| •
|
Replace any damaged clips.
|
|
|
[3Door]
| • |
Use a plastic panel removal tool to remove interior trim pieces
to protect from marring the surface.
|
| • |
Take care not to bend or scratch the trim and panels.
|
| • |
Put on gloves to protect your hands.
|
|
| 1. |
Remove the rear seat cushion assembly.
(Refer to Rear Seat - "Rear Seat Assembly")
|
| 2. |
Remove the rear seat back assembly.
(Refer to Rear Seat - "Rear Seat Assembly")
|
| 3. |
Remove the rear shelf side trim.
(Refer to Interior Trim - "Rear Shelf Side Trim")
|
| 4. |
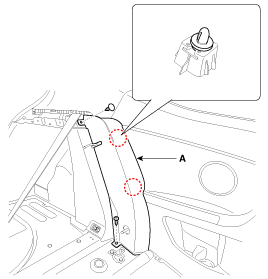
After loosening the mounting clip and screw, then remove the rear wheel
house trim (A).

|
| 5. |
Install in the reverse order of removal.
| •
|
Replace any damaged clips.
|
|
|
Component Location
[5Door]
1. Rear wheel house trim
[3Door]
1. Rear wheel house trim
...
Component Location
1. Rear transverse trim
...
 Rear Wheel House Trim Components and components location
 Rear Transverse Trim Components and components location


