Kia Rio: Driveshaft Assembly / TJ Joint
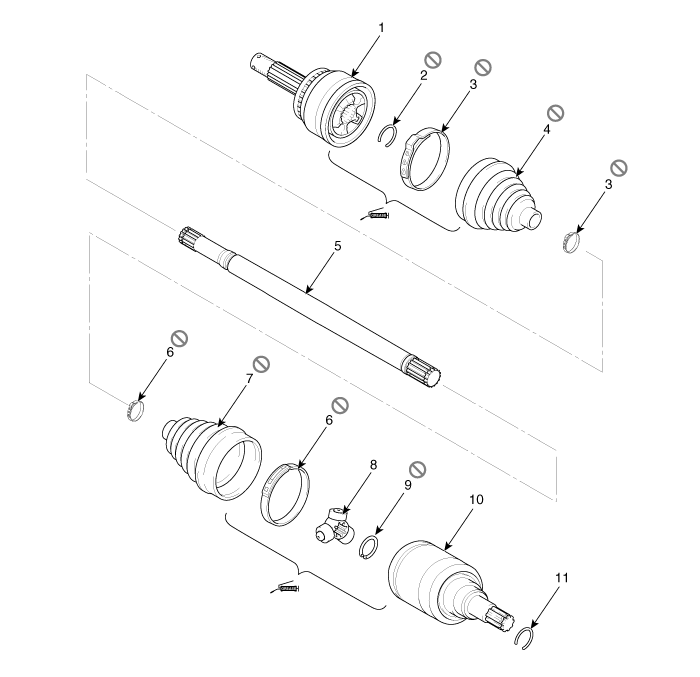
Components and components location
| Components |
| [RH] |

| 1. BJ assembly 2. Clip 3. BJ boot band 4. BJ boot |
5. Dynamic damper band
6. Dynamic damper 7. Shaft 8. TJ boot band |
9. TJ boot
10. Spider assembly 11. Circlip 12. TJ housing |
13. Circlip |
| [LH] |
| 1. BJ assembly 2. BJ circlip 3. BJ boot band 4. BJ boot |
5. Shaft 6. TJ boot band 7. TJ boot 8. Spider assembly |
9. Snap
ring 10. TJ case 11. Circlip |
Repair procedures
| Removal |
|

| 1. |
Remove the Front Driveshaft. (Refer to Driveshaft and axle - “Front Driveshaft”) |
| 2. |
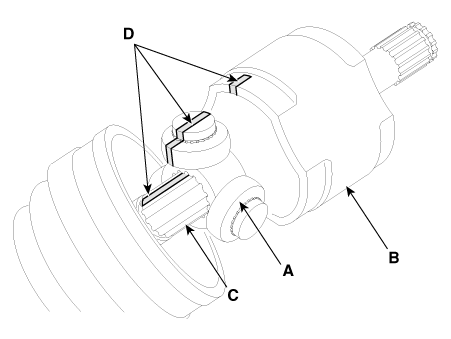
Remove the BJ circlip (B) from the TJ housing (A).
|

| 3. |
Remove both boot bands from the TJ housing.
|
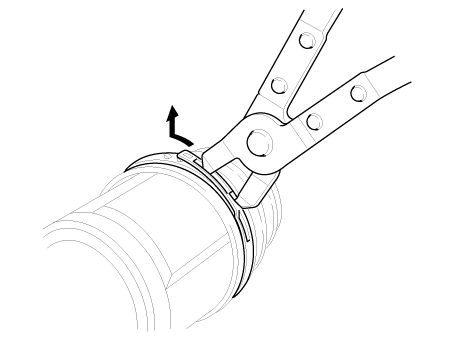
| 4. |
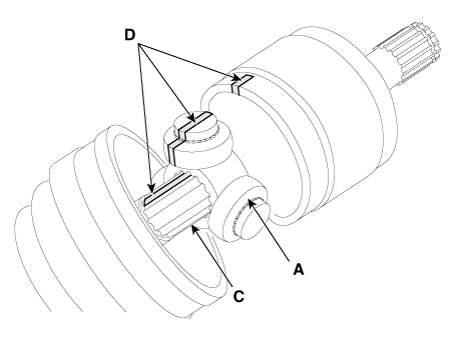
Remove the TJ circlip (A).
|
| 5. |
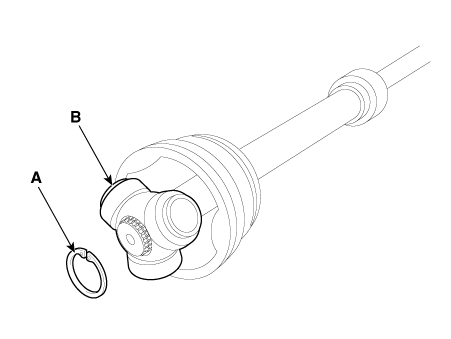
Remove the snap ring (A) and spider assembly (B).
|
| 6. |
Clean the spider assembly. |
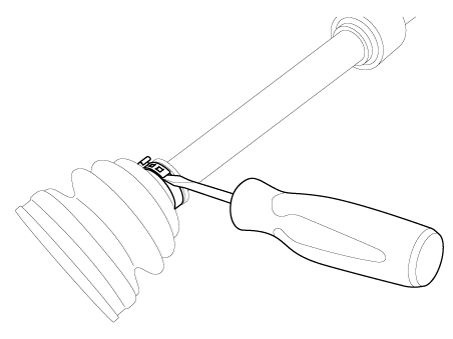
| 7. |
Remove the TJ boot (A).
|
| Inspection |
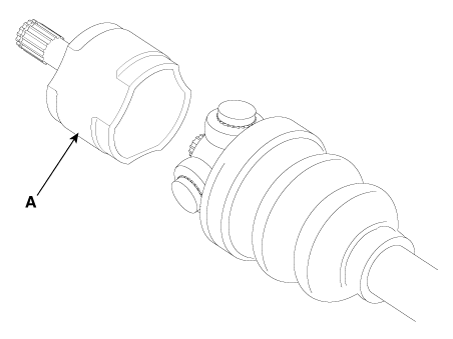
| 1. |
Check the spider assembly for roller rotation, wear or corrosion. |
| 2. |
Check the groove inside the joint case for wear or corrosion. |
| 3. |
Check the TJ boots for damage and deterioration. |
| Installation |
| 1. |
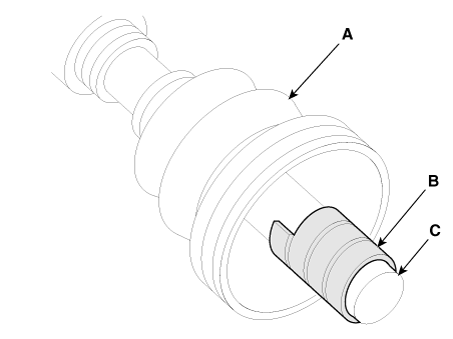
Wrap tape around the driveshaft spline (TJ) to prevent damaging the boot. |
| 2. |
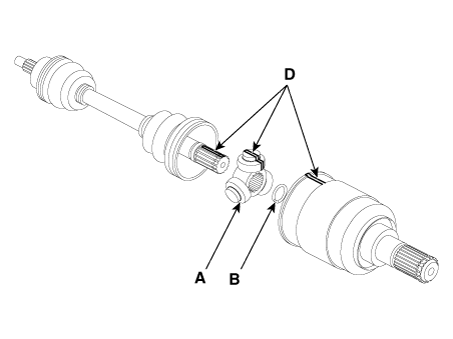
Using the alignment marks (D) made during disassembly as a guide, install the spider assembly (A) and snap ring (B) on the driveshaft splines (C).
|
| 3. |
Add specified grease to the joint boot as much as it was wiped away at inspection. |
| 4. |
Install both boot bands. |
| 5. |
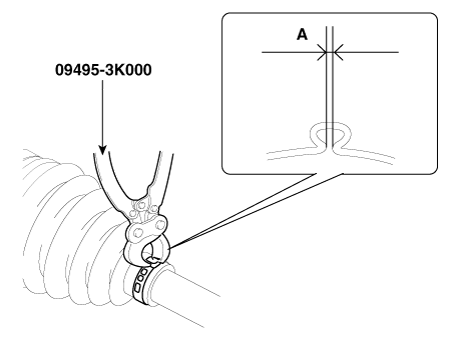
To control the air in the TJ boot, keep the specified distance between the boot bands when they are tightened.
|
|||||||||||||||||||||||
| 6. |
Using the SST (09495-3K000), secure the TJ boot bands.
|
| 7. |
Install the Front Driveshaft. (Refer to Driveshaft and axle - “Front Driveshaft”) |
| 8. |
Check the front alignment. (Refer to Suspension System - "Alignment") |
 Front Driveshaft
Components and components location
Components Location
1. Drive shasft (LH)
2. Drive shaft (RH)
[RH]
1. BJ assembly
2. Cl ...
 Dynamic Damper
Components and components location
Components
[RH]
1. BJ assembly
2. Clip
3. BJ boot band
4. BJ boot
5. Dynamic damper band
6. Dynami ...
Other information:
Kia Rio 2017-2020 YB Owners Manual: Tilting the sunroof
To tilt open the sunroof, push the sunroof control lever upward until the sunroof moves to the desired position. To close the sunroof, push the sunroof lever forward or pull downward until the sunroof moves to the desired position. WARNING - Sunroof Be careful that no head, hands and bod ...
Kia Rio 2017-2020 YB Owners Manual: Tire Pressure Monitoring System (TPMS - Type A)
(1) Low tire pressure telltale/ TPMS malfunction indicator Each tire, including the spare (if provided), should be checked monthly when cold and inflated to the inflation pressure recommended by the vehicle manufacturer on the vehicle placard or tire inflation pressure label. (If your vehicle ...