 Kia Rio: Rear Bumper Replacement
| [5 Door] |
| •
Put on gloves to protect your hands.
|
| •
Use a plastic panel removal tool to remove interior trip
pieces to without marring the surface.
|
| •
Take care not bend or scratch the cover and other parts.
|
|
1. |
After loosening the mounting screws, then remove the rear combination
lamp (A).

|
|
2. |
Disconnect the rear combination lamp connector (A).
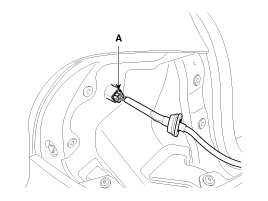
|
|
3. |
After loosening the rear bumper side’s mounting screws, then disconnect
the side’s.
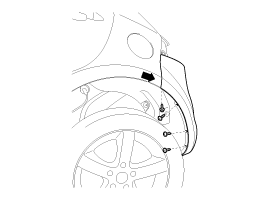
|
|
4. |
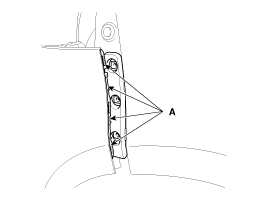
Remove the rear bumper after pull out the rear bumper.
|
|
•
When you pull out the rear bumper, the rear bumper
could be damaged by the projection (A).
|
|
5. |
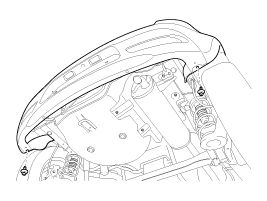
Loosen the rear bumper lower mounting bolts.
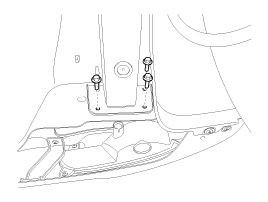
|
|
6. |
Loosen the rear bumper lower mounting clips.
|
|
7. |
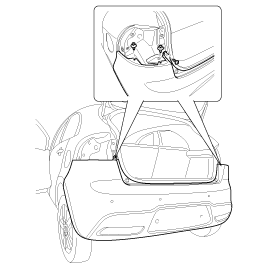
Loosen the rear bumper side mounting screw and clips.
|
|
8. |
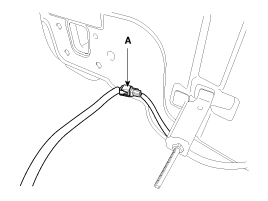
Push the lock pin, disconnect the rear bumper main connector (A).
|
|
9. |
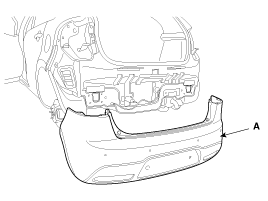
Remove the rear bumper cover (A).
|
|
10. |
Installation is the reverse of removal.
|
|
•
Make sure the connector is plugged in properly.
|
|
•
Replace any damage clips.
|
| [4 Door] |
| •
Put on gloves to protect your hands.
|
| •
Use a plastic panel removal tool to remove interior trim
pieces to without marring the surface.
|
| •
Take care not bend or scratch the cover and other parts.
|
|
1. |
Remove the rear combination lamp service hole (A).
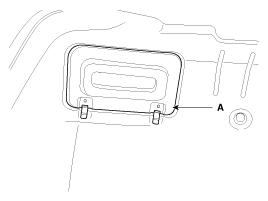
|
|
2. |
Disconnect the connector (A) and then loosening the rear combination
lamp mounting nuts.
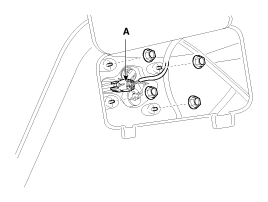
|
|
3. |
Remove the rear combination lamp (A).
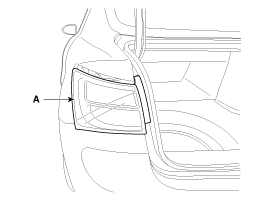
|
|
4. |
After loosening the mounting clip and screws, then remove the
rear mud guard (A).
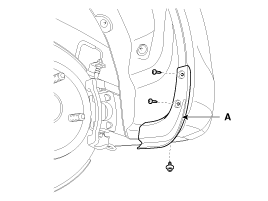
|
|
5. |
After loosening the rear bumper side’s mounting screw, then disconnect
the side’s.
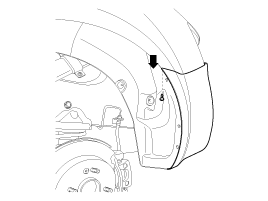
|
|
6. |
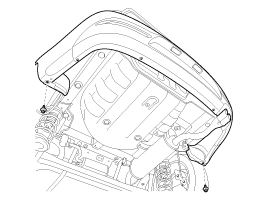
Loosen the rear bumper lower mounting clips.
|
|
7. |
Loosen the rear bumper lower mounting bolts.

|
|
8. |
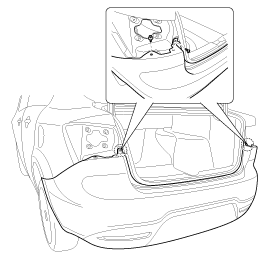
Loosen the rear bumper side mounting screw and clips.
|
|
9. |
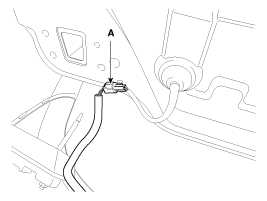
Push the lock pin, disconnect the rear bumper main connector (A).
|
|
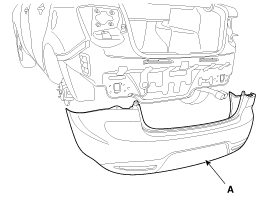
10. |
Remove the rear bumper cover (A).
|
|
11. |
Installation is the reverse of removal.
|
|
•
Make sure the connector is plugged in properly.
|
|
•
Replace any damage clips.
|
[5 Door]
1. Rear bumper cover
2. Rear bumper side bracket [RH]
3. Rear bumper side bracket [LH]
4. Rear bumper side under cover
[4 Door]
...
See also:
Lubricants
Items
Specified lubricants
Quantity
Input shaft spline
CASMOLY L9508
0.2g
Clutch release cylinder assembly
Brake flu ...
Installation
•
Install the component with the specified torques.
•
...
Operation
1.
Vehicle moving.
2.
The transmission lever position is D-range. The brake pedal is
released.
3.
The ...
 Kia Rio: Rear Bumper Replacement


 Rear Bumper Components