Kia Cee'd: Lighting System / Head Lamps Repair procedures
Kia Cee'd JD Service Manual / Body Electrical System / Lighting System / Head Lamps Repair procedures
| Inspection |
| 1. |
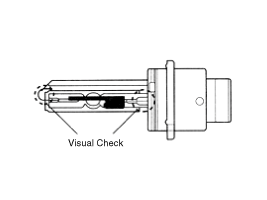
Check-points upon head lamp failure (HID)
|
| 2. |
Service procedure and warning (HID)
|
| 3. |
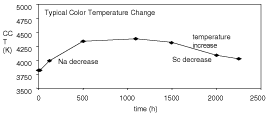
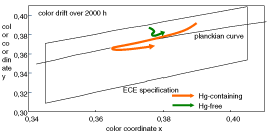
Understanding of color change by replacement of HID bulb.
|
Characteristic
| 1. |
Durable for vibration as there is no filament.
|
| 2. |
HID lamp had a more long life than halogen lamp.
|
| 3. |
Does not operate if polarity is changed.
|
| 4. |
Operating input voltage : 9-16V
|
Static Bending Lamp
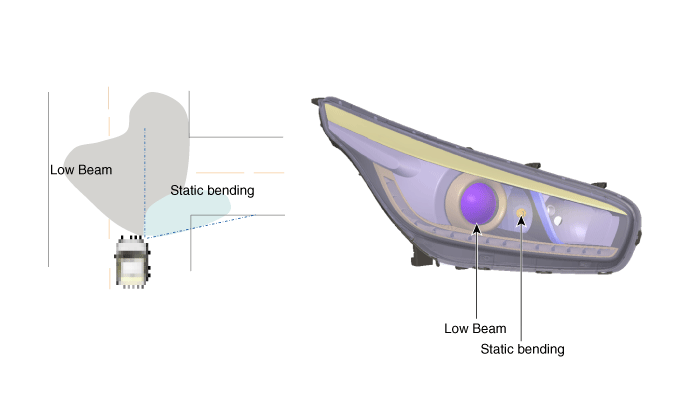
When the driver turn the steering wheel, the static bending lamp turn ON to
provide better nighttime visibility.
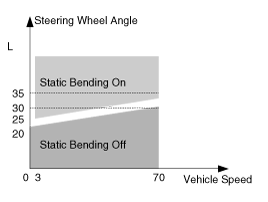
Static bending lamp turn ON according to the vehicle speed and steering wheel
angle.
| 1. |
Lamp ON condition
|
| 2. |
Lamp OFF condition
|
| 3. |
Left / Right cornering : Static lamp ON
|
Static bending lamp turn ON according to the vehicle speed and steering angle.
When the driver turn the steering wheel, the static bending lamp turn ON to
provide better nighttime visibility.
| Removal |
| 1. |
Disconnect the negative (-) battery terminal.
|
| 2. |
Remove the front bumper cover.
(Refer to Body - "Front Bumper Cover")
|
| 3. |
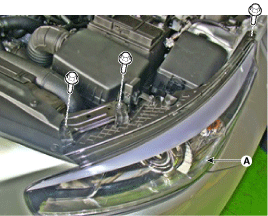
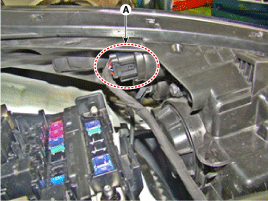
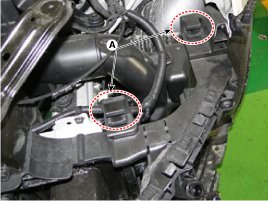
Loosening the head lamp mounting bolts (3EA) and disconnect the head
lamp connector (B).
Then, remove the head lamp assembly (A).
|
| 4. |
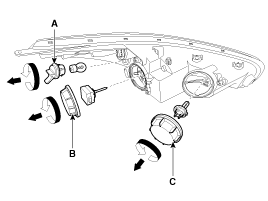
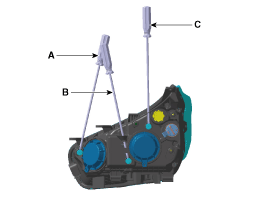
Remove the dust caps from the head lamp assembly after turning in the
counter clock-wise direction.
A : Turn signal lamp
B : Head lamp (Low) cap
C : Head lamp (High) cap
|
| Installation |
| 1. |
Install the head lamp bulbs.
|
| 2. |
Connect the connectors.
|
| 3. |
Install the head lamp with the head lamp bolts (3EA).
|
| 4. |
Connect the negative (-) battery terminal.
|
| Head Lamp Aiming Instructions |
The head lamps should be aimed with the proper beam-setting equipment, and in
accordance with the equipment manufacturer's instructions.
If there are any regulations pertinent to the aiming of head lamps in
the area where the vehicle is to be used, adjust so as to meet those
requirements.
|
Alternately turn the adjusting gear to adjust the head lamp aiming. If beam-setting
equipment is not available, proceed as follows:
| 1. |
Inflate the tires to the specified pressure and remove any loads from
the vehicle except the driver, spare tire, and tools.
|
| 2. |
The vehicle should be placed on a flat floor.
|
| 3. |
Draw vertical lines (Vertical lines passing through respective head
lamp centers) and a horizontal line (Horizontal line passing through
center of head lamps) on the screen.
|
| 4. |
With the head lamp and battery in normal condition, aim the head lamps
so the brightest portion falls on the horizontal and vertical lines.
A : Vertical (High)
B : Vertical (Low)
C : Horizontal (Low)
|
Front Fog Lamp Aiming
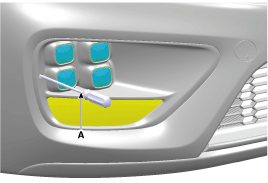
The front fog lamps should be aimed as the same manner of the head lamps aiming.
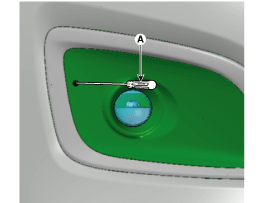
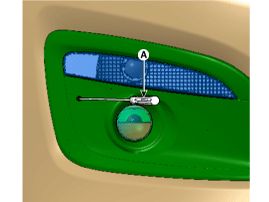
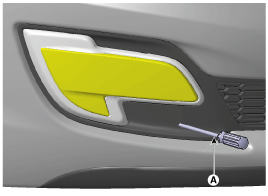
With the front fog lamps and battery normal condition, aim the front fog lamps
by turning the adjusting screw (A) with a driver.
| 1. |
5 Door type
[Fog]
[Fog + DRL]
|
| 2. |
3 Door type
|
| 3. |
Gasoline 1.6 Turbo GDI engine type
|
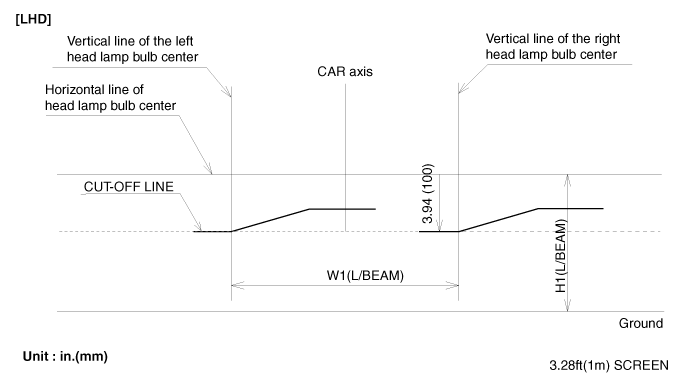
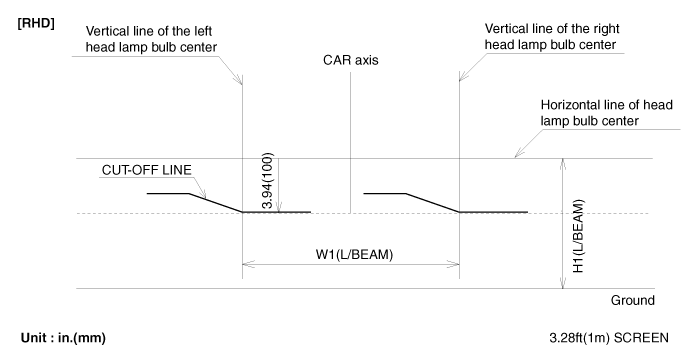
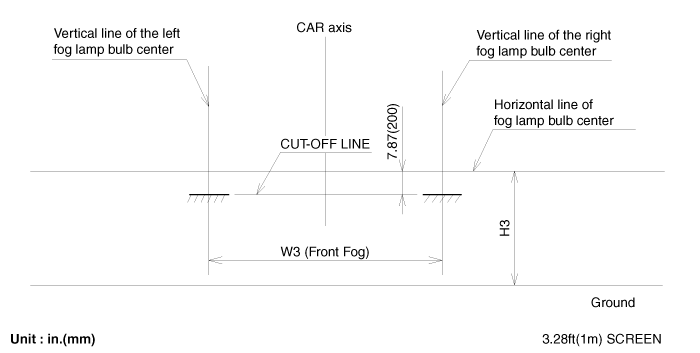
Head Lamp And Fog Lamp Aiming Point
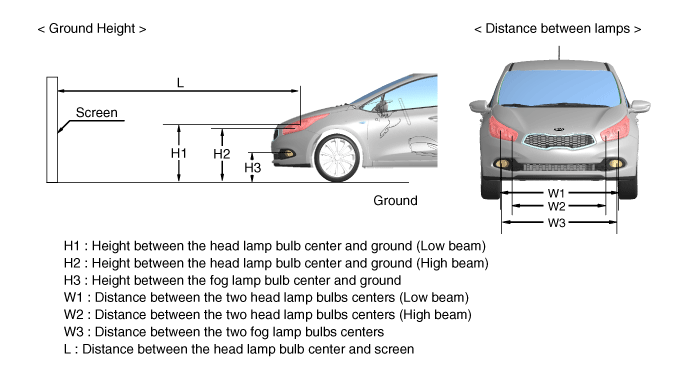
| 1. 5 Door type |
HEAD LAMP (Standard)

HEAD LAMP (AFLS)

FOG LAMP (DRL + FOG)

FOG LAMP (FOG ONLY)

| 2. 3 Door type |
HEAD LAMP

FOG LAMP (DRL + FOG)

FOG LAMP (FOG ONLY)

| 3. Gasoline 1.6 Turbo GDI engine type |
HEAD LAMP

FOG LAMP (FOG ONLY)

| 1. |
Head Lamp (Low beam)
LHD type
RHD type
|
| 2. |
Turn the front fog lamp on without the driver aboard.
The cut-off line should be projected in the allowable range (shaded
region)
|
| Replacement |
Head lamp (Low)
| [HID type] |
| 1. |
Turn the lamp switch off.
|
| 2. |
Disconnect the connector.
|
| 3. |
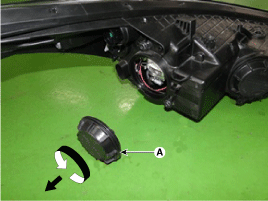
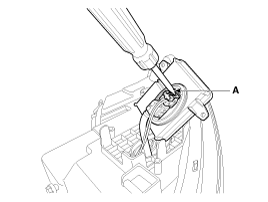
Remove the dust cap (A).
|
| 4. |
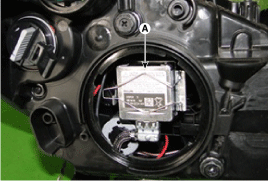
Remove the ignitor fixing clip (A).
|
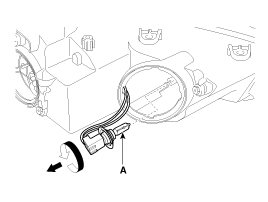
| 5. |
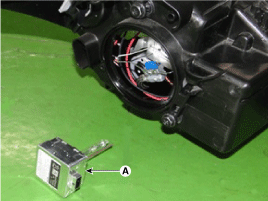
Remove the ingnitor and HID bulb (A).
|
| 6. |
Installation is the reverse of removal.
|
| Head lamp (High) |
| 1. |
Turn the lamp switch off.
|
| 2. |
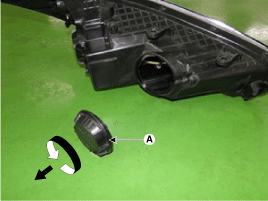
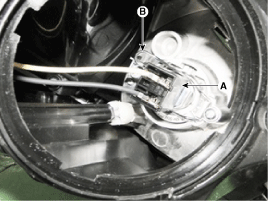
Remove the dust cap (A).
|
| 3. |
Remove the connector (A) and fixing clip (B).
|
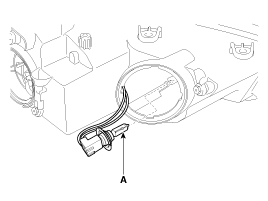
| 4. |
Remove the bulb (A).
|
| 5. |
Installation is the reverse of removal.
|
Ballast
| 1. |
Turn the lamp switch off.
|
| 2. |
Remove the head lamp assembly.
|
| 3. |
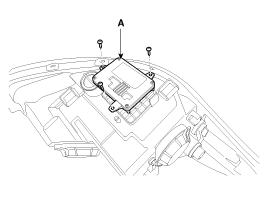
Disconnect the power connector from the lamp.
|
| 4. |
Remove the ballast (A) after loosening the screws (4EA).
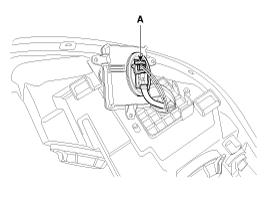
|
| 5. |
Disconnect the connector (A).
|
| 6. |
Installation is the reverse of removal.
|
Turn signal lamp
| 1. |
Turn the lamp switch off.
|
| 2. |
Turn the bulb socket (A) counterclockwise and remove it from head lamp
assembly.
|
| 3. |
Remove the bulb from socket.
|
| 4. |
Installation is the reverse of removal.
|
 Head Lamps Description and operation
Description and Operation
HID Head Lamp
1.
Bulb
(1)
Elements
Xenon gas: Xenon gas activates the initial rea ...
 Room Lamp Repair procedures
Inspection
Room Lamp
1.
Check that the switch operates properly after disconnecting the room
lamp connector (A).
Rem ...
Other information:
Kia Cee'd JD Service Manual: Crankshaft Damper Pulley Components and components location
Components
1. Crankshaft damper pulley
...
Kia Cee'd JD Service Manual: Crankshaft Damper Pulley Repair procedures
Removal and Installation
1.
Remove the drive belt.
(Refer to Timing System - "Dreve Belt")
2.
Remove the engineroom under cover.
3.
Remove the passenger side front tire.
...

