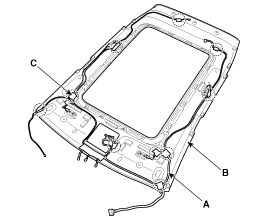
Kia Cee'd: Roof Trim / Roof Trim Assembly Repair procedures
Kia Cee'd JD Service Manual / Body (Interior and Exterior) / Roof Trim / Roof Trim Assembly Repair procedures
| Replacement |
|
|
| 1. |
Remove the rear seat assembly.
(Refer to Rear Seat - "Rear Seat Assembly")
|
| 2. |
Remove the front pillar trim.
(Refer to Interior Trim - "Front Pillar Trim")
|
| 3. |
Remove the canter pillar upper trim.
(Refer to Interior Trim - "Center Pillar Trim")
|
| 4. |
Remove the luggage side trim.
(Refer to Interior Trim - "Luggage Side Trim")
|
| 5. |
Remove the rear pillar trim.
(Refer to Interior Trim - "Rear Pillar Trim")
|
| 6. |
Remove the sunvisor and retainer.
(Refer to Roof Trim - "Sunvisor")
|
| 7. |
Remove the assist handle.
(Refer to Roof Trim - "Assist Handle")
|
| 8. |
Remove the overhead console lamp.
|
| 9. |
Remove the room lamp. [General type]
|
| 10. |
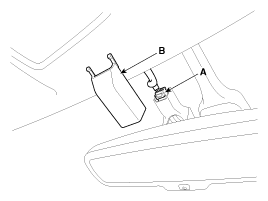
Remove the ECM mirror cover (B).
|
| 11. |
Disconnect the ECM mirror connector (A).
|
| 12. |
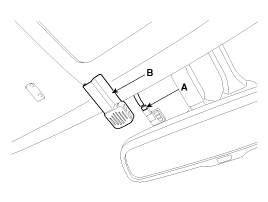
Remove the auto defog sensor cover (B).
|
| 13. |
Disconnect the auto defog sensor connector (A).
|
| 14. |
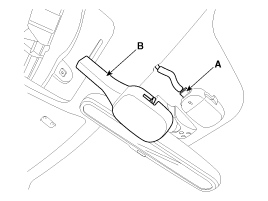
Remove the rain sensor cover (B).
|
| 15. |
Disconnect the rain sensor connector (A).
|
| 16. |
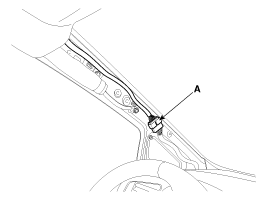
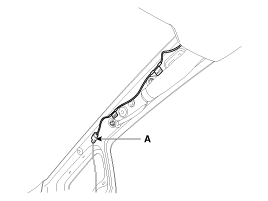
Disconnect the roof trim main connector (A) and the mounting clips in
the front pillar.
|
| 17. |
Disconnect the roof antenna connector (A) and the mounting clips in
the front pillar.
|
| 18. |
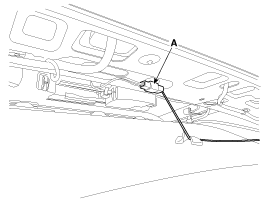
Disconnect the roof antenna connector (A).
|
| 19. |
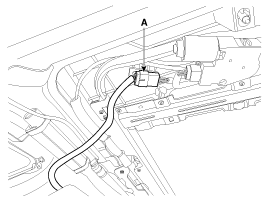
Disconnect the panoramaroof motor connector (A).
|
| 20. |
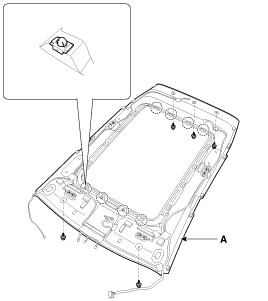
Detach the clips, then remove the roof trim assembly (A).
|
| 21. |
Remove the vanity lamp.
|
| 22. |
Remove the hands free mic.
|
| 23. |
Remove roof trim wiring harness (A) from the roof trim (B).
|
| 24. |
Install in the reverse order of removal.
|
 Roof Trim Assembly Components and components location
Component Location
1. Roof Trim Assembly
...
 Interior Trim
...
Other information:
Kia Cee'd JD Service Manual: Purge Control Solenoid Valve (PCSV) Repair procedures
Inspection
1.
Turn the ignition switch OFF.
2.
Disconnect the PCSV connector.
3.
Measure resistance between the PCSV terminals 1 and 2.
4.
Check that the resistance is within ...
Kia Cee'd JD Owners Manual: Components of the Tire Mobility Kit
1. Speed restriction label
2. Sealant bottle and label with
speed restriction
3. Filling hose from sealant bottle to
wheel
4. Connectors and cable for the battery
direct connection
5. Holder for the sealant bottle
6. Compressor
7. On/off switch
8. Pressure gauge for displaying the
t ...


