Kia Rio: AVN System / AVN(Audio Video Navigation) head unit
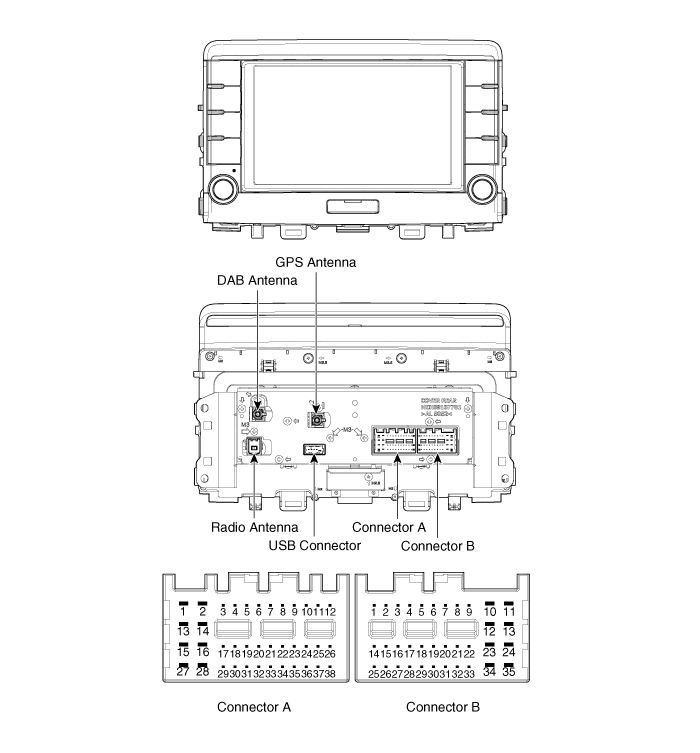
Components and components location

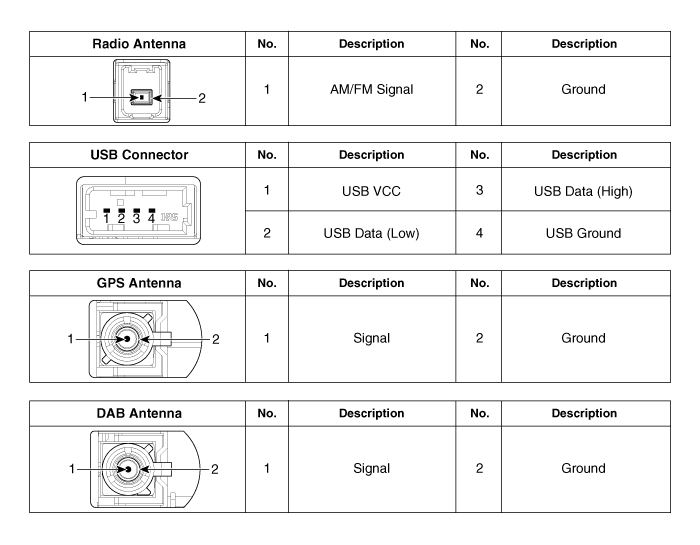
Connector Pin Information
No.
|
Connector A
|
Connector B
|
1
|
Rear door left speaker (+)
|
-
|
2
|
Rear door left speaker (-)
|
MIC (+)
|
3
|
-
|
-
|
4
|
-
|
-
|
5
|
-
|
Antenna power
|
6
|
Camera Power
|
Illumination (+)
|
7
|
Camera Video
|
Multimedia-CAN (High)
|
8
|
-
|
-
|
9
|
-
|
ALT Left_output (-)
|
10
|
AUX Audio right_input
|
Battery (+)
|
11
|
AUX Detect
|
Battery (+)
|
12
|
Steering wheel remote controller
|
Ground
|
13
|
Front door left speaker (+)
|
Ground
|
14
|
Front door left speaker (-)
|
MIC (Ground)
|
15
|
Front door right speaker (-)
|
MIC (-)
|
16
|
Front door right speaker (+)
|
-
|
17
|
-
|
-
|
18
|
-
|
-
|
19
|
-
|
Illumination (-)
|
20
|
Camera Power_Ground
|
Multimedia-CAN (Low)
|
21
|
Camera Video_Ground
|
-
|
22
|
-
|
ACC
|
23
|
-
|
-
|
24
|
AUX Audio left_input
|
-
|
25
|
AUX Audio ground
|
Reverse
|
26
|
Steering wheel remote controller (Ground)
|
Door open
|
27
|
Rear door right speaker (-)
|
Door unlock_status
|
28
|
Rear door right speaker (+)
|
Manual parking
|
29
|
-
|
'P' Position
|
30
|
-
|
Auto light
|
31
|
-
|
-
|
32
|
-
|
-
|
33
|
Camera shield_Ground
|
IGN1
|
34
|
-
|
-
|
35
|
-
|
-
|
36
|
-
|
|
37
|
-
|
38
|
Vehicle speed
|

Repair procedures
| • |
Be careful not to scratch the center fascia upper panel and related
parts.
|
| • |
Wrap the protective tape on the tool to disassemble with the
screwdriver or remover.
|
| • |
Take caution when keeping and handling during disassembly/assembly
as it is easily contaminated by lubricant and oil.
|
|
| 1. |
Disconnect the negative (-) battery terminal.
|
| 2. |
Remove the center fascia duct assembly.
(Refer to Body - "Center Fascia Panel")
|
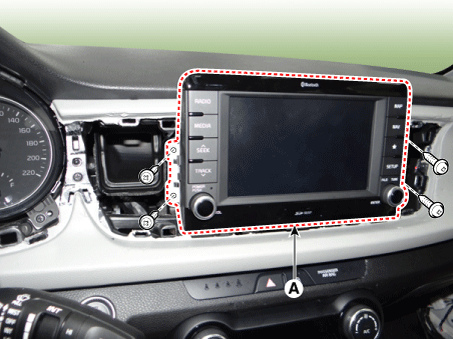
| 3. |
Remove the AVN head unit (A) after loosening the mounting screws.

|
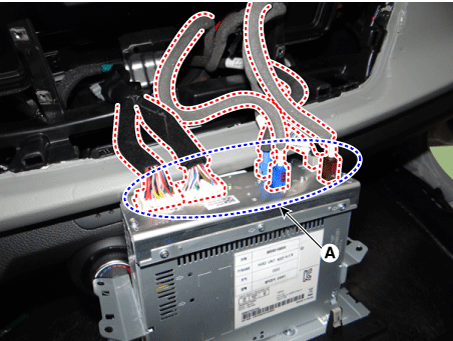
| 4. |
Remove the AVN head unit after disconnecting the connectors and antenna
cable (A).

|
| 1. |
Connect the AVN head unit connectors and antenna cable.
|
| 2. |
Install the AVN head unit.
|
| 3. |
Install the center fascia duct assembly.
|
| 4. |
Connect the negative (-) battery terminal.
|
| • |
Make sure the connector are connected in properly.
|
| • |
Check the AVN system for normal operation.
|
|
Components and components location
Component Location
1 . AVN head unit
2. Roof antenna (Radio+GPS+DAB)
3 . Multimedia jack
4 . Steering wheel remote control ...
Repair procedures
Inspection
Troubleshooting of the speakers
When handling the speakers :
...
Other information:
1. Open the hood.
2. Remove the bulb-socket from the headlamp assembly by turning the bulb-socket
counterclockwise until the tabs on the bulb-socket align with the slots on the headlamp
assembly.
3. Remove the bulb from the bulbsocket by pulling it out.
4. Insert a new bulb by inserting it ...
Specifications
Specification
Item
Specification
Type
Normal open
Input voltage
12 V
Coil resistance
3.5 ± 0.2 Ω (at 25°C, 77°F)
Frequency
...


 AVN System
 Speaker


