Kia Rio: Brake System / Front Disc Brake
Components and components location
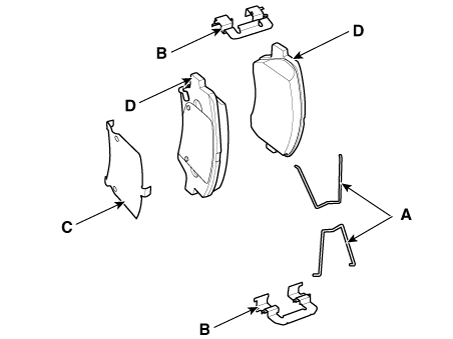
| Components |
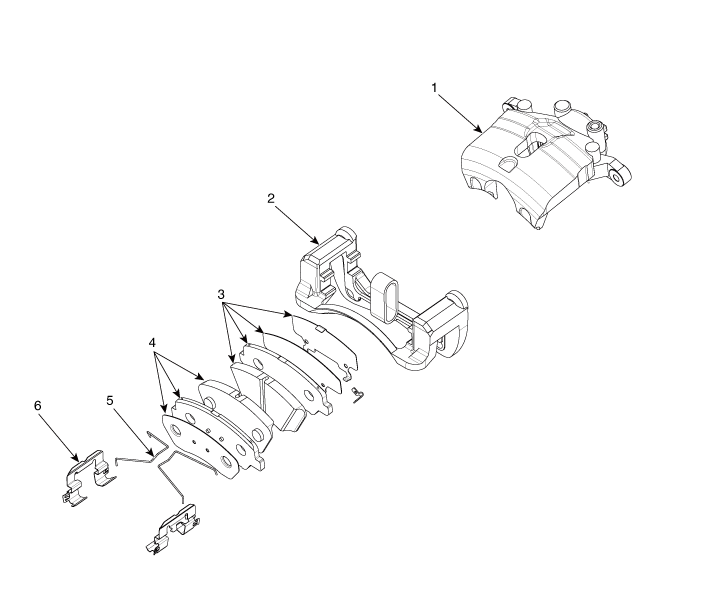
| 1. Caliper body 2. Caliper carrier 3. Brake pad assembly [IN] |
4. Brake pad assembly [OUT]
5. Pad return spring 6. Pad liner |
Repair procedures
| Removal |
Brake Pad
| 1. |
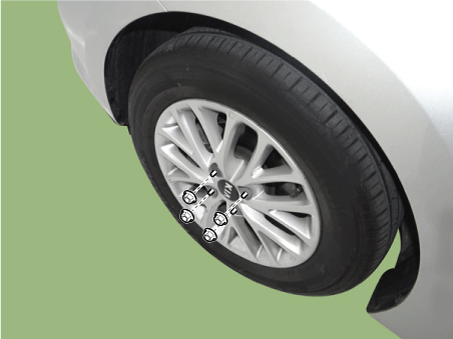
Remove the front wheel & tire.
|
| 2. |
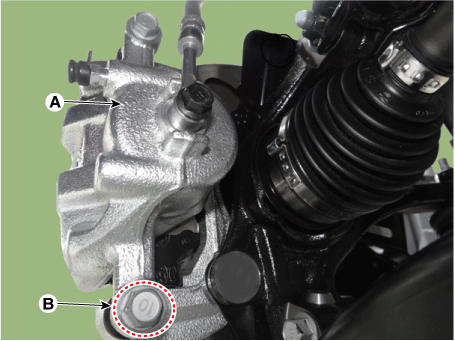
Loosen the guide rod bolt (B) and then pivot the caliper body (A) up out of the way.
|
| 3. |
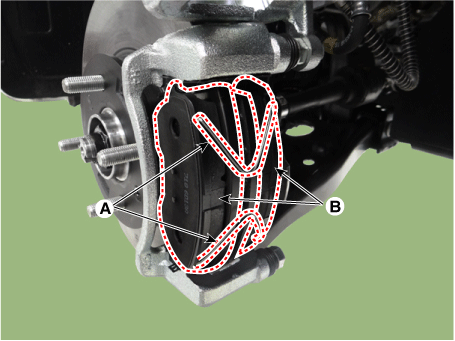
Remove the pad return spring (A) and then separate the brake pad (B).
|

Caliper Assembly
| 1. |
Remove the front wheel & tire.
|
| 2. |
Loosen the guide rod bolt (B) and then pivot the caliper body (A) up out of the way.
|
| 3. |
Remove the pad return spring (A) and then separate the brake pad (B).
|
| 4. |
Loosen the bolts (A,B) and then remove the brake caliper.
|

Disc
| 1. |
Remove the front wheel & tire.
|
| 2. |
Loosen the guide rod bolt (B) and then pivot the caliper body (A) up out of the way.
|
| 3. |
Remove the pad return spring (A) and then separate the brake pad (B).
|
| 4. |
Loosen the bolts (A,B) and then remove the brake caliper.
|
| 5. |
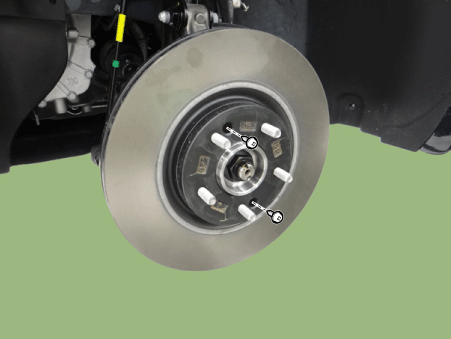
Remove the brake disc after loosening the screw.
|
| Inspection |
Front brake disc thickness check
| 1. |
Check the brake pads for wear and fade. |
| 2. |
Check the brake disc for damage and cracks. |
| 3. |
Remove all rust and contamination from the surface, and measure the disc thickness at 8 points, at least, at the same distance (5mm) apart from the brake disc outer circle.
|
| 4. |
If wear exceeds the limit, replace the discs and pad assembly left and right of the vehicle. |
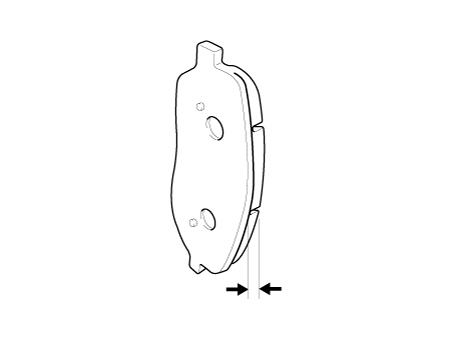
Front Brake Pad Check
| 1. |
Check the pad wear. Measure the pad thickness and replace it, if it is less than the specified value.
|
| 2. |
Check that grease is applied to sliding contact points and check the pad and backing metal for damage.
|
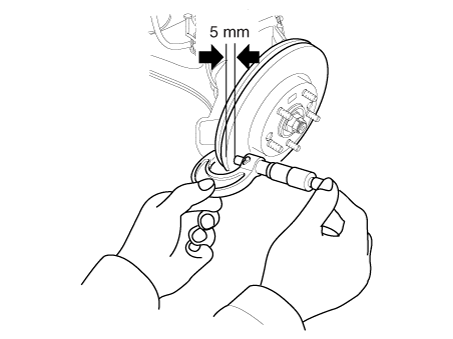
Front brake disc runout check
| 1. |
Place a dial gauge about 5mm (0.2 in.) from the outer circumference of the brake disc, and measure the runout of the disc.
|
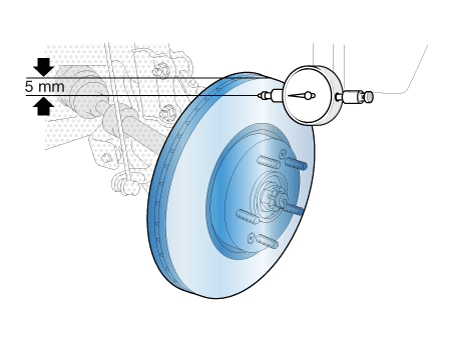
| 2. |
If the runout of the brake disc exceeds the limit specification, replace the disc, and then measure the runout again. |
| 3. |
If the runout does not exceed the limit specification, install the brake disc after turning it 180° and then check the brake disc again for runout. |
| 4. |
If the runout cannot be corrected by changing the position of the brake disc, replace the brake disc. |
| Installation |
| 1. |
Install in the reverse order of removal. |
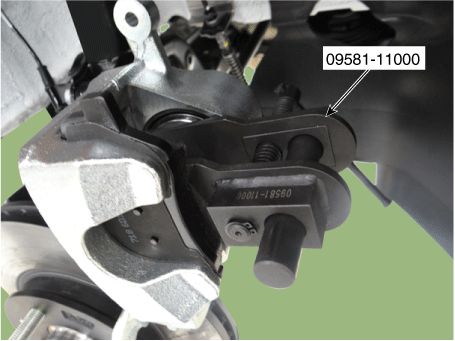
| 2. |
Use the SST (09581-11000) when installing the brake caliper assembly.
|
| 3. |
After installation, bleed the brake system. (Refer to Brake system - "Brake System") |
 Brake Pedal
Components and components location
Components
1. Brake member assembly
2. Stop lamp switch
3. Pedal assembly
Repair procedures
Removal
...
 Rear Disc Brake
Components and components location
Components
1. Cable cuide & Lever
2. Caliper body
3. Torque member
4. Brake pad
5. Return spring
Repa ...
Other information:
Kia Rio 2017-2020 YB Owners Manual: Recommended lubricants and capacities
To help achieve proper engine and powertrain performance and durability, use only lubricants of the proper quality. The correct lubricants also help promote engine efficiency that results in improved fuel economy. These lubricants and fluids are recommended for use in your vehicle. M/T : Ma ...
Kia Rio 2017-2020 YB Owners Manual: TPMS (Tire Pressure Monitoring System) malfunction indicator
The TPMS malfunction indicator will illuminate after it blinks for approximately one minute when there is a problem with the Tire Pressure Monitoring System. If the system is able to correctly detect an underinflation warning at the same time as system failure then it will illuminate the TPM ...