Kia Rio: Front Door / Front Door Window Glass
Components and components location
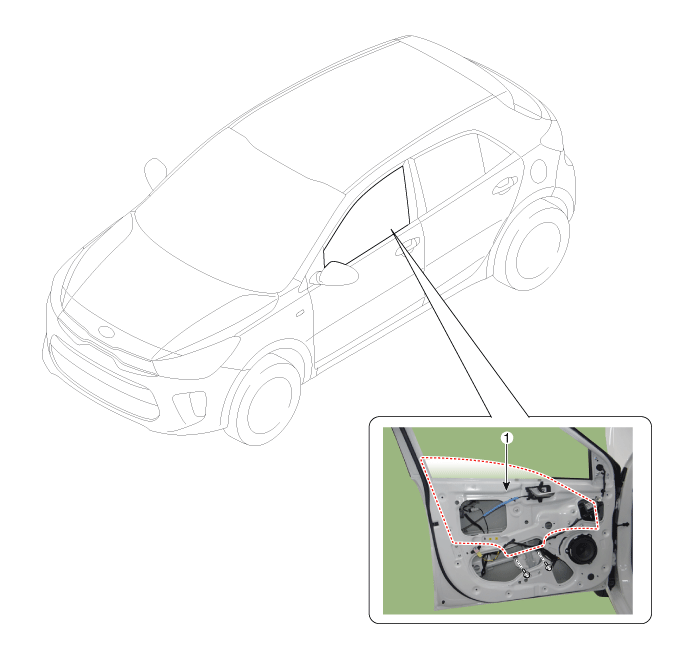
1. Front door window glass
|
|
Repair procedures
|
Put on gloves to protect your hands.
|
| • |
Use a plastic panel removal tool to remove interior trim pieces
without marring the surface.
|
| • |
Be careful not to bend or scratch the trim and panels.
|
|
| 1. |
Remove the front door trim.
(Refer to Front Door - "Front Door Trim")
|
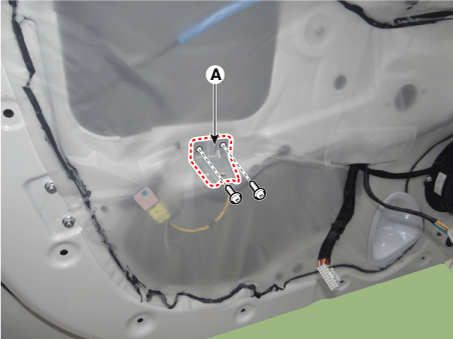
| 2. |
Remove the door pull handle mounting support (A) after loosening the
screws.
|
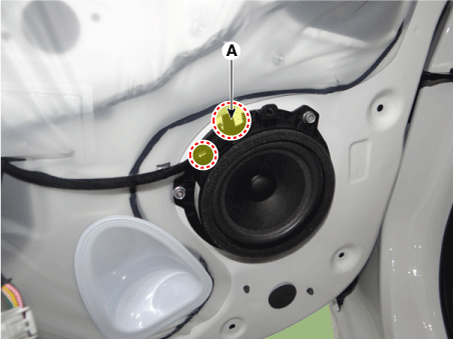
| 3. |
Disconnect the front door speaker connector (A), and then remove the
wiring mounting clips.
|
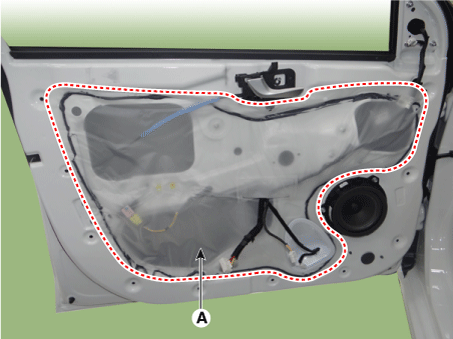
| 4. |
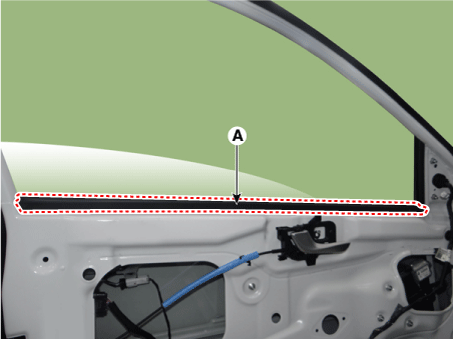
Remove the front door trim seal (A).
|
| 5. |
Remove the front door belt inside weather strip (A).
|
| 6. |
By operating the power window switch, pull down until the window glass
mounting bolt is visible.
|
Be careful not to damage the glass surface.
|
|
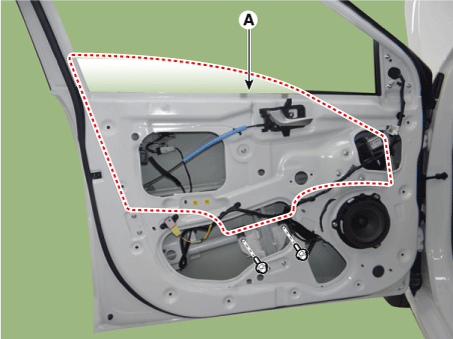
| 7. |
Loosen the mounting bolt, and pull out the front door window glass (A)
by tilting it sideways.
|
Be careful not to drop the glass and/or scratch the glass surface.
|
| •
|
Use the door switch to align the mounting bolt in the
door.
|
| •
|
If the window motor cannot be operated, remove the motor
and align the hole by hand.
|
|
|
| 8. |
Install in the reverse order of removal.
| •
|
Check that glass operation is normal.
|
| •
|
Check the damage glass channel, and replace if necessary.
|
| •
|
Adjust glass if necessary.
|
|
|
Repair procedures
Replacement
Put on gloves to protect your hands.
&nbs ...
Repair procedures
Replacement
Put on gloves to protect your hands.
&nbs ...
Other information:
■ Front view
1. Hood
2. Head lamp (Features of your vehicle)
Head lamp (Maintenance)
3. Front fog lamp (Features of your vehicle)
Front fog lamp or DRL lamp (Maintenance)
4. Wheel and tire
5. Outside rearview mirror
6. Sunroof
7. Front windshield wiper blades (Features of your vehicle)
...
Ventilation
1. Set the mode to the position.
2. Set the air intake control to the outside (fresh) air position.
3. Set the temperature control to the desired position.
4. Set the fan speed control to the desired speed.
Heating
1. Set the mode to the position.
2. Set the air intake control t ...


 Front Door Inside Handle
 Front Door Power Window Regulator