Kia Rio: Front Suspension System / Front Lower Arm
Repair procedures
| 1. |
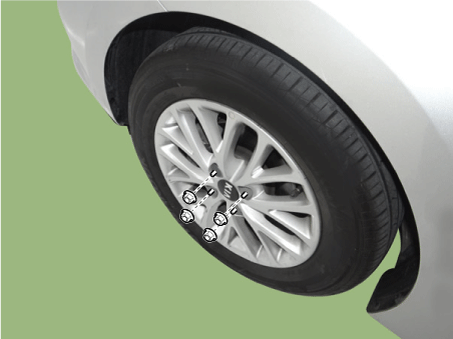
Remove wheel nuts, front wheel and tire from front hub.
|
Tightening torque:
107.9 - 127.5 N·m (11.0 - 13.0 kgf·m, 79.6 - 94.0 lb·ft)
|
|
Be careful not to damage the hub bolts when removing the front
wheel and tire.
|
|
| 2. |
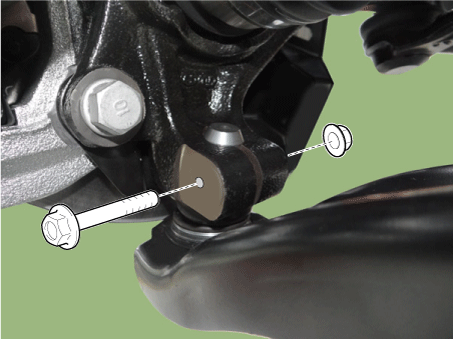
Remove the lower arm bolt and nut (A).
|
Tightening torque:
58.8 - 70.6 N·m (6.0 - 7.2 kgf·m, 43.4 - 52.1 lb·ft)
|
|
| 3. |
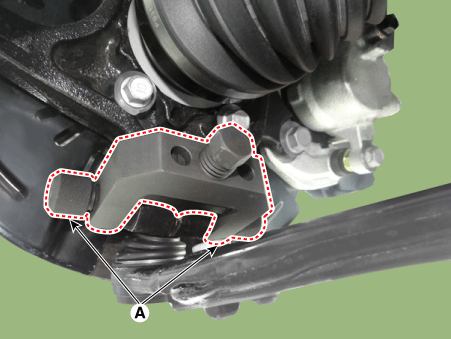
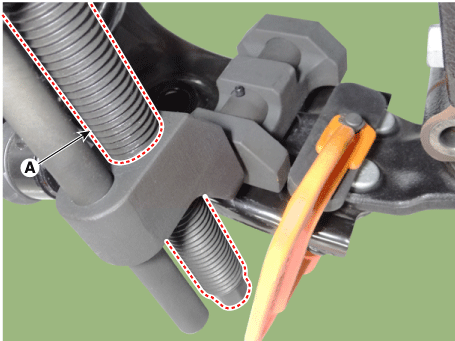
Remove the front lower arm from the front knuckle using the SST (0K545-A9100).
| (1) |
After removing bolts from the front knuckle, install and tighten
the sub body bolt (A).
|
| (2) |
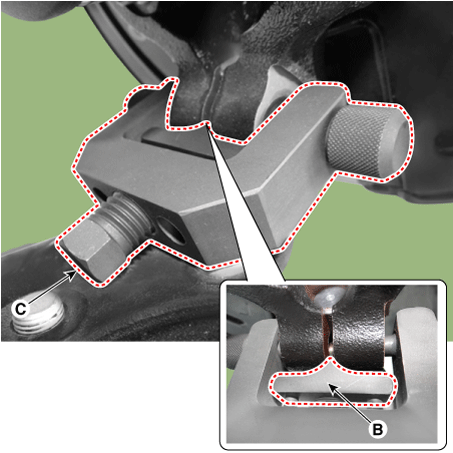
Input the sub body (B) between the front knuckle and the sub
body bolt.
|
| (3) |
Tighten the bolt (C) of the sub body to broaden the gap of the
front knuckle.
|
| (4) |
Install the safe wire (A).
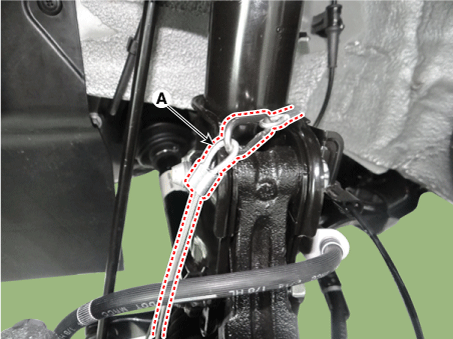
|
| (5) |
Install the main body (A) between the front strut and the lower
arm.
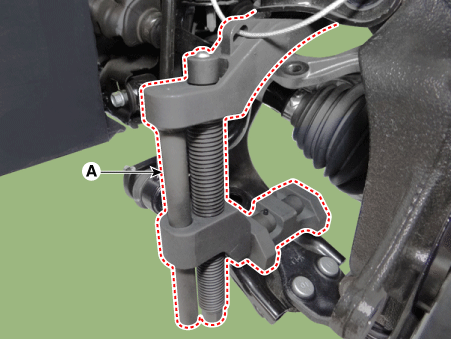
|
| (6) |
To avoid the main body coming off, install a fixing clamp (A)
beside the main body.
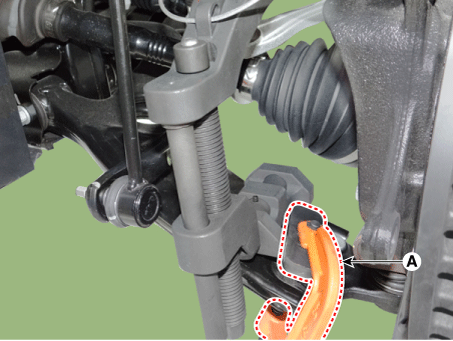
|
| (7) |
After installing a body (A), rotate the handle (B) clockwise
util the clamp is fixed on the lower arm.
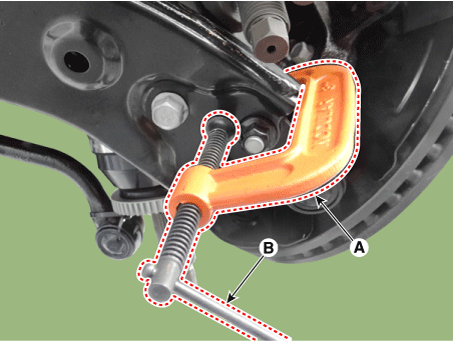
|
| (8) |
Tighten the main body bolt (A) slowly and remove the lower arm
from the front knuckle.
|
|
| 4. |
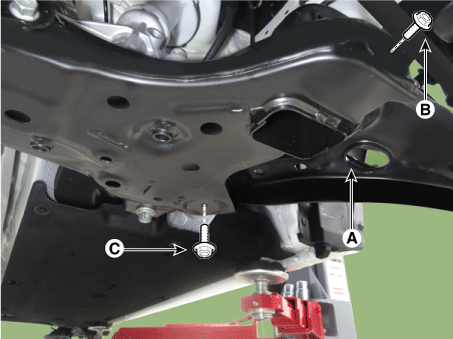
Remove the lower arm (A) from the sub frame.
|
Tightening torque:
B : 117.7 - 137.3 N·m (12.0 - 14.0 kgf·m, 86.8 - 101.3 lb·ft)
C : 156.9 - 176.5 N·m (16.0 - 18.0 kgf·m, 115.7 - 130.2 lb·ft)
|
|
| 5. |
Install in the reverse order of removal.
|
| 6. |
Check the wheel alignment.
(Refer to Tires/Wheels - "Alignment")
|
Lower arm ball joint
| 1. |
Remove the front lower arm.
(Refer to Suspension System - "Front Lower Arm")
|
| 2. |
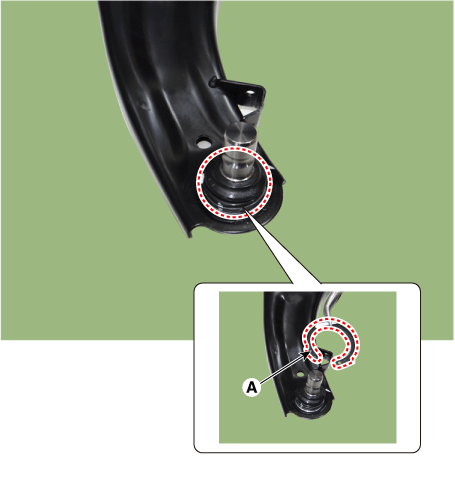
Remove the snap ring (A) from the lower arm ball joint.
|
| 3. |
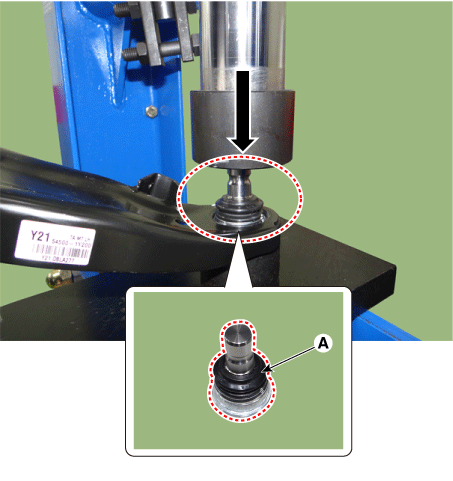
Using a press, remove the ball joint (A) from the lower arm.
|
| 4. |
Using a press, install the new ball joint.
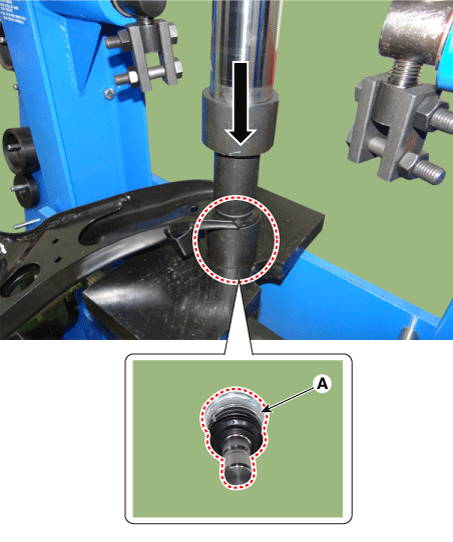
|
| 1. |
Check the bushing for wear and deterioration.
|
| 2. |
Check the lower arm for bending or breakage.
|
| 3. |
Check the lower arm for deformation.
|
| 4. |
Check all bolts and nuts.
|
Components and components location
Components Location
1. Lock nut
2. Insulator dust cap
3. Self lock nut
4. Strut insulator
5. Strut bearing
6. Spring u ...
Repair procedures
Removal
1.
Remove the universal joint bolt (A).
Tightening torque :
32.4 - 37.3 N·m (3.3 - 3.8 kgf·m, 23.9 - 27.5 lb·ft)
...
Other information:
Finish damage repair
Deep scratches or stone chips in the painted surface must be repaired promptly.
Exposed metal will quickly rust and may develop into a major repair expense.
If your vehicle is damaged and requires any metal repair or replacement, be sure
the body shop applies anti-corrosio ...
This section will guide you in the proper loading of your vehicle and/or trailer,
to keep your loaded vehicle weight within its design rating capability, with or
without a trailer. Properly loading your vehicle will provide maximum return of
the vehicle design performance. Before loading your ...
 Front Strut Assembly
 Front Stabilizer Bar


