Kia Rio: Crash Pad / Main Crash Pad Assembly
Components and components location
| Component Location |
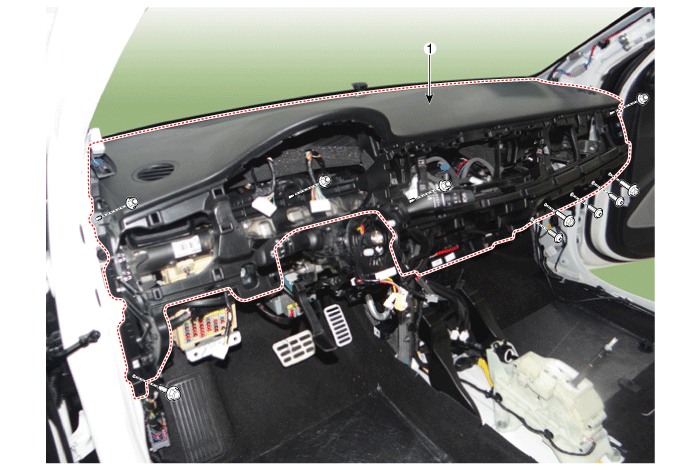
| 1. Main crash pad assembly
|
Repair procedures
| Replacement |
Put on gloves to protect your hands. |
|
| 1. |
Disconnect the negative (-) battery terminal. |
| 2. |
Remove the front seat. (Refer to Front Seat - "Front Seat Assembly") |
| 3. |
Remove the floor console assembly. (Refer to Floor Console - "Floor Console Assembly") |
| 4. |
Remove the cluster fascia panel. (Refer to Crash Pad - "Cluster Fascia Panel") |
| 5. |
Remove the crash pad lower panel [LH]. (Refer to Crash Pad - "Crash Pad Lower Panel") |
| 6. |
Remove the center fascia panel. (Refer to Crash Pad - "Center Fascia Panel") |
| 7. |
Remove the heater control unit. (Refer to Heating,Ventilation And Air Conditioning - "Heater & A/C Control Unit (FATC)") |
| 8. |
Remove the crash pad center lower panel. (Refer to Crash Pad - "Crach Pad Center Panel") |
| 9. |
Remove the steering wheel. (Refer to Steering System - "Steering Wheel") |
| 10. |
Remove the steering column shroud lower panel. (Refer to Crash Pad - "Steering Column Shroud Panel") |
| 11. |
Remove the front pillar trim. (Refer to Interior Trim - "Front Pillar Trim") |
| 12. |
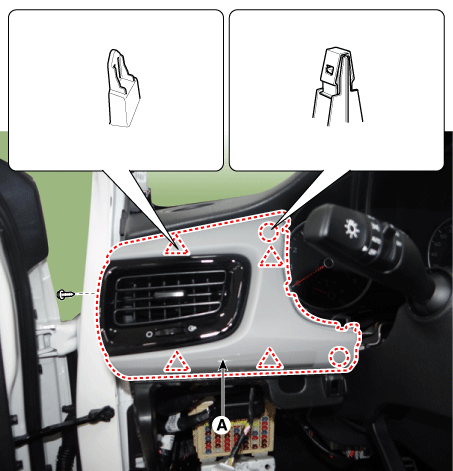
Remove the crash pad driver side panel & air vent duct (A).
|
| 13. |
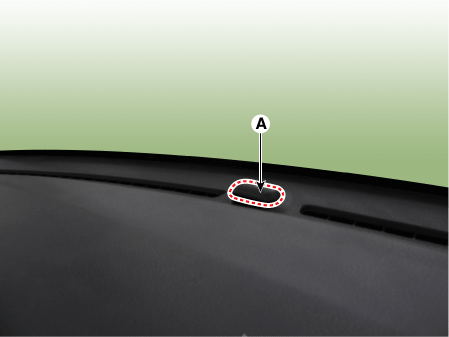
Separate the photo sensor (A) by using a remover.
|
| 14. |
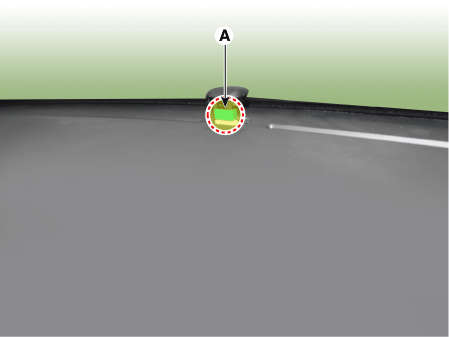
Remove the photo sensor (A), after disconnecting the photo sensor connector.
|
| 15. |
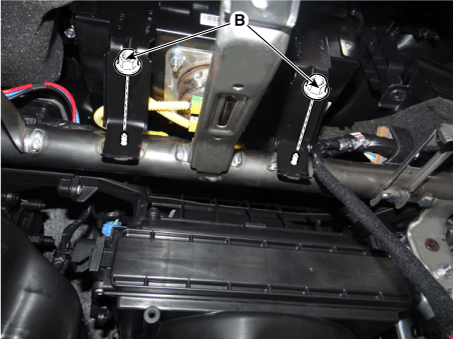
Disconnecting the airbag connector (A) after loosening the mounting nuts (B).
|
| 16. |
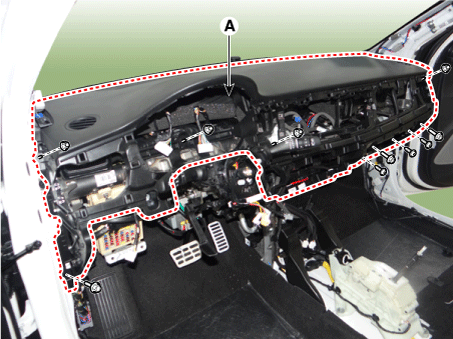
Remove the main crash pad assembly (A), after loosening the mounting bolts and nuts.
|
| 17. |
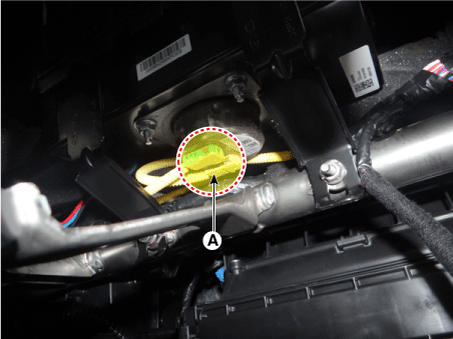
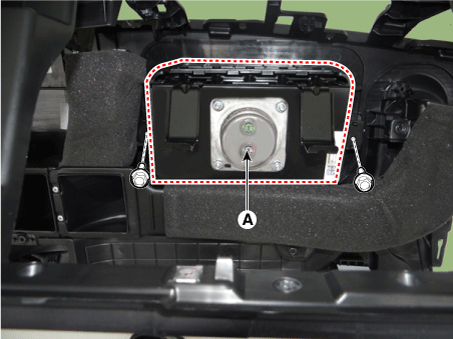
Remove the passenger airbag (A) after loosening the screws.
|
| 18. |
Install in the reverse order of removal.
|
 Crach Pad Center Panel
Components and components location
Component Location
1. Crash pad center lower panel
Repair procedures
Replacement
...
 Cowl Cross Bar Assembly
Components and components location
Component Location
1. Main crash pad assembly
Repair procedures
Replacement
...
Other information:
Kia Rio 2017-2020 YB Owners Manual: Certification label
The certification label is located on the driver's door sill at the center pillar. This label shows the maximum allowable weight of the fully loaded vehicle. This is called the GVWR (Gross Vehicle Weight Rating). The GVWR includes the weight of the vehicle, all occupants, fuel and cargo. This ...
Kia Rio 2017-2020 YB Service Manual: Roof Trim Assembly
Components and components location Component Location 1. Roof Trim Assembly Repair procedures Replacement Put on gloves to protect your hands. ...


