 Kia Rio: Compressor Removal
|
1. |
If the compressor is marginally operable, run the engine at idle
speed, and let the air conditioning work for a few minutes, then shut
the engine off.
|
|
2. |
Disconnect the negative cable from the battery.
|
|
3. |
Recover the refrigerant with a recovery/charging station.
|
|
4. |
Remove the RH front tire.
(Refer to SS group - “Front Tire”)
|
|
5. |
Remove the engine room RH side under cover.
(Refer to EM group - “Engine and Transaxle Assembly”)
|
|
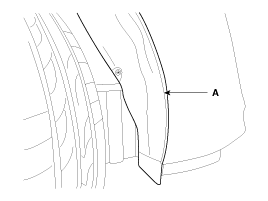
6. |
Separate the front portion of the front wheel guard (A) from the
wheel house.

|
|
7. |
Loosen the drive belt.
(Refer to EM group - “Timing Chain”)
|
|
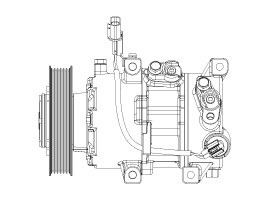
8. |
Disconnect the suction line (A) and discharge line (B) from the
compressor.

Plug or cap the lines immediately after disconnecting
them to avoid moisture and dust contamination.
|
|
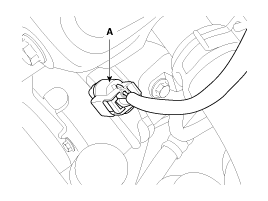
9. |
Disconnect the compressor switch connector (A).

|
|
10. |
Remove the compressor by loosening the mounting bolts.

|
1. Center Bolt
2. Hub Bolt
3. Hub Assembly
4. Snap Ring
5. Pulley
6. Compressor Assembly
7. Electric Control Valve (ECV)
...
1.
Make sure of the length of compressor mounting bolts, and then
tighten it with the specified tightening order.
Tightening torque :
...
See also:
Fluid Replacement
ATF of 6 speed automatic transaxle doesn’t need to be replaced.
If the vehicle is used severely in business or personal ...
4Door Under Body
Projected Dimensions
Front side member tooling hole (Ø6.6)
Front side member tooling hole (Ø6.6)
...
Component Location
1. Head cap
2. Nut
3. Rear wiper arm & Blade
4. Packing (rubber)
5. Rear wiper motor assembly
6. Bolt
...
 Kia Rio: Compressor Removal


 Compressor Components
 Compressor Installation