 Kia Rio: Radiator: Removal and Installation
|
1. |
Disconnect the battery negative terminal.
Tightening torque
(-) terminal (without battery sensor):
7.8 ~ 9.8N.m (0.8 ~ 1.0kgf.m, 5.8 ~ 7.2lb-ft)
(-) terminal (with battery sensor):
4.0 ~ 6.0N.m (0.4 ~ 0.6kgf.m, 3.0 ~ 4.4lb-ft)
|
|
|
2. |
Remove the air cleaner assembly. (Refer to Intake and exhaust
system in this group)
|
|
3. |
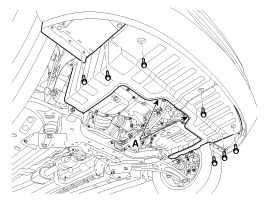
Remove the under covers (A).
Tightening torque:
6.9 ~ 10.8 N.m (0.7 ~ 1.1 kgf.m, 5.1 ~ 8.0 lb-ft)
|
|
|
4. |
Loosen the drain plug and drain the coolant. Open the radiator
cap to make rapid draining.
Never remove the radiator cap when the engine is hot.
Serious scalding could be caused by hot fluid under high pressure
escaping from the radiator.
|
|
5. |
Remove the radiator upper hose (A) and lower hose (B).

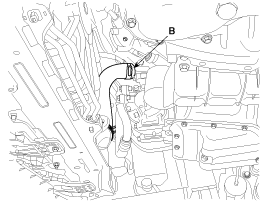
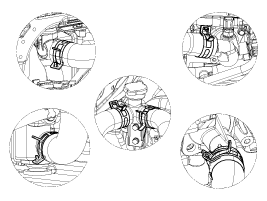
Install the radiator hoses as shown illustrations.
|
|
6. |
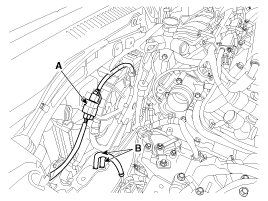
Disconnect the fan connector (A) and the ATF cooler hoses (B)(A/T
only). (Refer to AT group)
|
|
7. |
Remove the front bumper. (Refer to BD group)
|
|
8. |
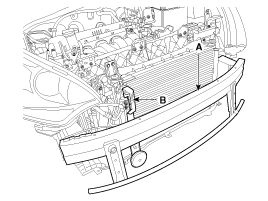
Remove the rail (A) and the air guard (B).
|
|
9. |
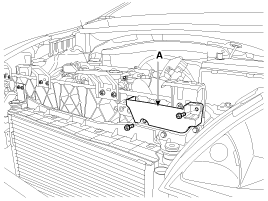
Remove the cover (A).
|
|
10. |
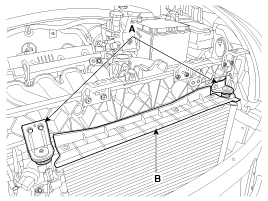
Remove the upper cover (A) and the radiator mounting brackets
(B).
Tightening torque :
6.9 ~ 10.8N.m (0.7 ~ 1.1kgf.m, 5.1 ~ 8.0lb-ft)
|
|
|
11. |
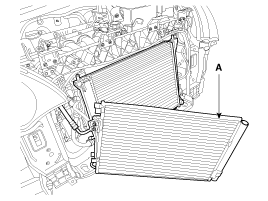
Remove the A/C condenser (A) from the radiator assembly and then
lift up the radiator assembly (B).
|
|
12. |
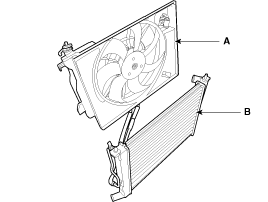
Remove the cooling fan (A) from the radiator (B).
|
|
13. |
Installation is reverse order of removal.
|
|
•
Bleed air from the cooling system.
|
|
-
Start engine and let it run until it warms up.
(Until the radiator fan operates 3 or 4 times.)
|
|
-
Turn off engine. Check the coolant level and add
coolant if needed. This will allow trapped air to be
removed from the cooling system.
|
|
-
Put the radiator cap on tightly, then run engine
again and check for leaks.
|
Radiator Cap Testing
1.
Remove the radiator cap, wet its seal with engine coolant, then
install it to pressure tester.
2.
Apply ...
See also:
General
1.
Basically, all measurements in this manual are taken with a tracking
gauge.
2.
When a measuring tape is used, check to be sure there is ...
Installation
1.
Install in the reverse order of removal.
Battery sensor cable installation
bolt: 10.8 ~ 13.7 N.m (1.1 ~ 1.4 kgf.m, 8.0 ~10.1
lb-ft)
...
Multimedia Jack Circuit Diagram
...
 Kia Rio: Radiator: Removal and Installation


 Radiator: Inspection