Kia Rio: Interior Trim / Rear Pillar Trim
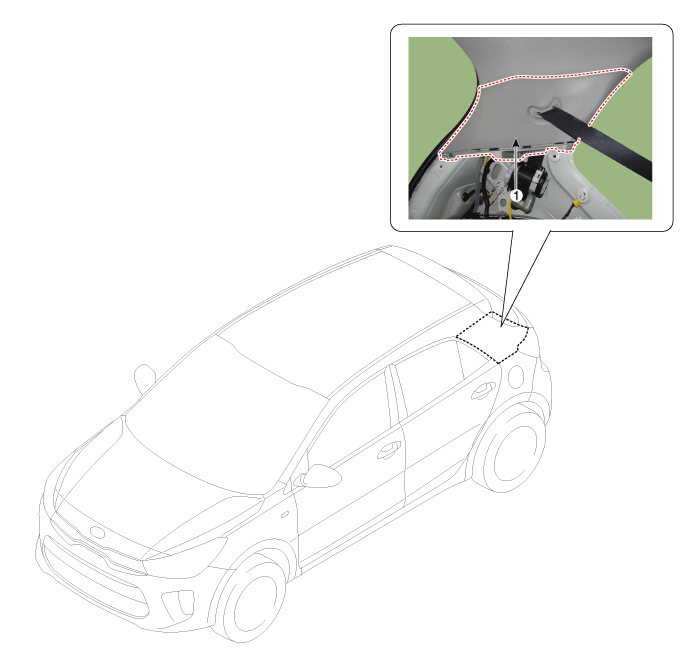
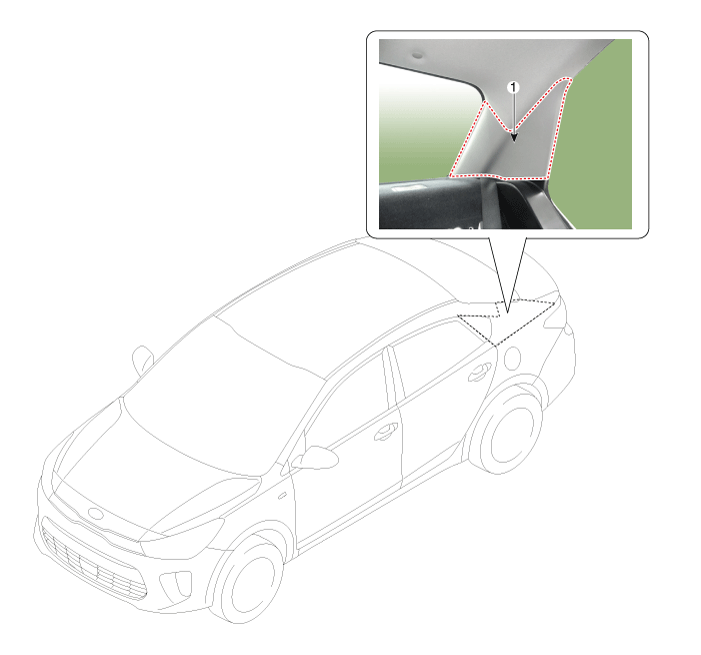
Components and components location


Repair procedures
|
Put on gloves to protect your hands.
|
| • |
Use a plastic panel removal tool to remove interior trim pieces
without marring the surface.
|
| • |
Take care not to bend or scratch the trim and panels.
|
|
| 1. |
Remove the luggage side trim.
(Refer to Interior Trim - "Luggage Side Trim")
|
| 2. |
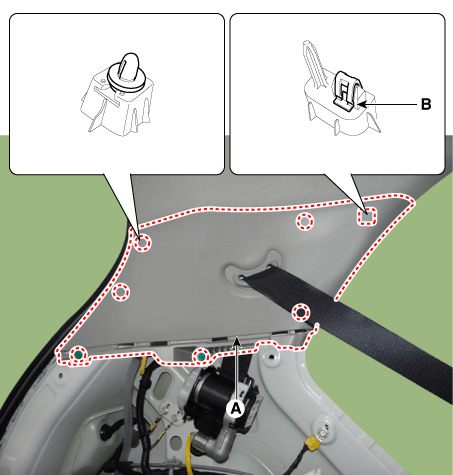
Remove the rear pillar trim (A).

|
| 3. |
Install in the reverse order of removal.
| •
|
Replace any damaged clips.
|
| •
|
Once the trim has been removed replace the clip (B) with
a new one.
|
|
|
|
Put on gloves to protect your hands.
|
| • |
Use a plastic panel removal tool to remove interior trim pieces
without marring the surface.
|
| • |
Take care not to bend or scratch the trim and panels.
|
|
| 1. |
Fold the rear seat back assembly.
|
| 2. |
Remove the rear pillar trim (A) by using a remover.

|
| 3. |
Install in the reverse order of removal.
| •
|
Replace any damaged clips.
|
| •
|
Once the trim has been removed replace the clip (B) with
a new one.
|
|
|
Components and components location
Component Location
1. Luggage side trim
Repair procedures
Replacement
&nbs ...
Components and components location
Component Location
1. Rear wheel house trim
Repair procedures
Replacement
&nbs ...
Other information:
Front
❈ The actual air bags in the vehicle may differ from the illustration.
Your vehicle is equipped with a side air bag in each front seat. The purpose
of the air bag is to provide the vehicle's driver and/or the front passenger with
additional protection than that offered by the seat ...
Repair procedures
Inspection
Check if the auto light control operates like a timing chart shown below. Tail
lamp output and head lamp (Low) output is controlled based on the auto light sensor's
input (illumination intensity) when the Auto Light Switch in Multi-Function Switch
...


 Luggage Side Trim
 Rear Wheel House Trim


