 Kia Rio: Disassembly
Engine removal is required for this procedure. (Refer to Engine and transaxle
assembly removal in this group)
|
1. |
M/T : Remove the fly wheel.
|
|
2. |
A/T : Remove the drive plate.
|
|
3. |
Install the engine to engine stand for disassembly.
|
|
4. |
Remove the timing chain. (Refer to Timing chain in this group)
|
|
5. |
Remove the cylinder head. (Refer to Cylinder head in this group)
|
|
6. |
Remove the water jacket insert (A).
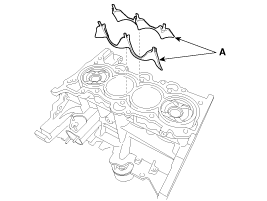
Be careful not to deform or damage it when removing.
|
|
7. |
Remove the oil level gauge tube.
|
|
8. |
Remove the knock sensor (A) and the oil filter (B).

|
|
9. |
Remove the oil pressure switch (A).

|
|
10. |
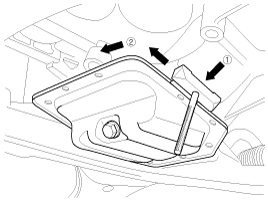
Using the SST (09215-3C000), remove the oil pan (A).
|
|
•
Insert the SST between the oil pan and the ladder
frame by tapping it with a plastic hammer in the direction
of  arrow. arrow.
|
|
•
After tapping the SST with a plastic hammer along
the direction of  arrow around arrow around
more than 2/3 edge of the oil pan, remove it from the
ladder frame.
|
|
•
Do not turn over the SST abruptly without tapping.
It is result in damage of the SST.
|
|
11. |
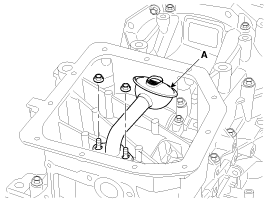
Remove the oil screen (A).
|
|
12. |
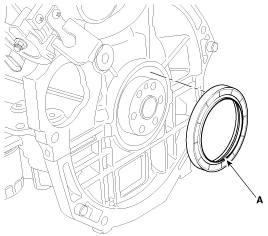
Remove the rear oil seal (A).
|
|
13. |
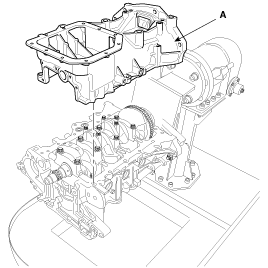
Remove the ladder frame (A).
|
|
14. |
Check the connecting rod end play.
|
|
15. |
Remove the connecting rod caps and check oil clearance.
|
|
16. |
Remove the piston and connecting rod assemblies.
|
|
(1) |
Using a ridge reamer, remove all the carbon from the top
of the cylinder.
|
|
(2) |
Push the piston, connecting rod assembly and upper bearing
through the top of the cylinder block.
|
|
•
Keep the bearings, connecting rod and
cap together.
|
|
•
Arrange the piston and connecting rod
assemblies in the correct order.
|
|
17. |
Remove the crankshaft bearing cap and check oil clearance.
|
|
18. |
Check the crankshaft end play.
|
|
19. |
Lift the crankshaft (A) out of the engine, being careful not to
damage journals.
Arrange the main bearings and thrust bearings in the correct
order.
|

|
20. |
Check fit between piston and piston pin.
Try to move the piston back and forth on the piston pin.
If any movement is felt, replace the piston and pin as a set.
|
|
21. |
Remove the piston rings.
|
|
(1) |
Using a piston ring expander, remove the 2 compression
rings.
|
|
(2) |
Remove the 2 side rails and coil spring.
Arrange the piston rings in the correct order
only.
|
|
22. |
Remove the connecting rod from the piston.
Using a press, remove the piston pin from piston.
(Press-in load : 500 ~ 1,500kg(1,102 ~ 3,306lb))
|
1. Cylinder block
2. Ladder frame
3. Crankshaft
4. Crankshaft upper bearing
5. Crankshaft lower bearing
6. Thrust bearing
7. Main bearing cap
8. Adapter plate
...
Connecting Rod And Crankshaft
1.
Check the connecting rod end play.
Using feeler gauge, measure the end play while moving the connecting
rod back and f ...
See also:
Special Service Tools
Tool
(Number and Name)
Illustration
Use
09200-3N000
Engine support fixture (Beam)
Removal and installation of the transaxle.
Use t ...
Rear Bumper Replacement
[5 Door]
•
Put on gloves to protect your hands.
•
...
Removal
1.
Remove the trunk trim in the trunk after removing the screws and
clips.
(Refer to the BD group - "Tailgate")
2.
Remove ...
 Kia Rio: Disassembly


 arrow.
 arrow around


 Components
 Inspection