Kia Rio: Disassembly
1. |
Remove the rear cover (A) after removing nuts.
|
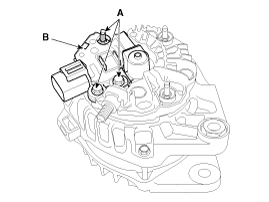
2. |
Remove the mounting bolts (A) and the brush holder assembly (B).
|
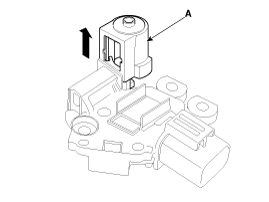
3. |
Remove the slip ring guide (A) after pulling it.
|
4. |
Remove the OAD(Overrunning Alternator Decoupler) cap.
|
|
•
When installing, replace with new OAD cap.
|
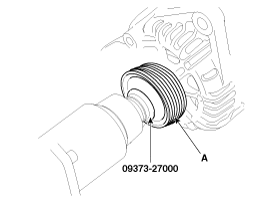
5. |
Remove the OAD(Overrunning Alternator Decoupler) pulley (A) using
the special tool.
|
6. |
Remove the nut and pulley(A). (NON- OAD)
|
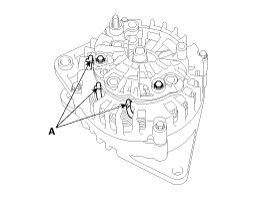
7. |
Unsolder the 3 stator leads (A).
|
8. |
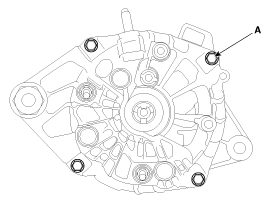
Remove the 4 through bolts (A).
|
9. |
Disconnect the rotor (A) and bracket (B).
|
1.
Install in the reverse order of removal.
2.
Adjust the alternator belt tension after installation.
(Refer to Engine charging Sy ...
1.
Reassemble in the reverse order of disassembly.
•
...
See also:
Components Location
1. Sub frame
2. Drive shaft
3. Lower arm
4. Strut assembly
5. Steering gearbox
6. Stabilizer bar
...
Interior light
Do not use the interior lights for extended periods when the engine is not running.
It may cause battery discharge.
WARNING - Interior light
Do not use the interior lights when driving in the dark. ...
Hood Adjustment
Hood Adjustment
1.
After loosening the hinge (A) mounting bolt, adjust the hood (B)
by moving it up or down, or right or left.
2.
Adjus ...