 Kia Rio: Disassembly
|
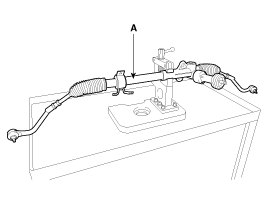
1. |
Fix the steering gear box assembly (A) on the vice.
|
|
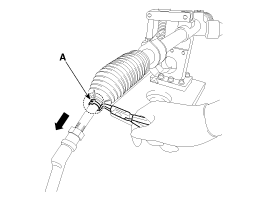
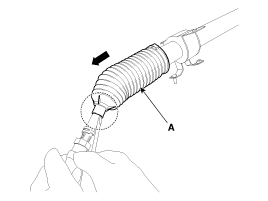
2. |
Remove the bellows clip (A) in the direction of the arrow. (The
left and right same work.)
|
|
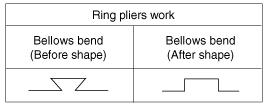
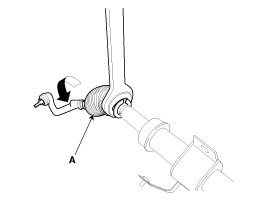
3. |
Give space to bellows bend (B) by using the ring pliers (A). (The
left and right same work)
|
|
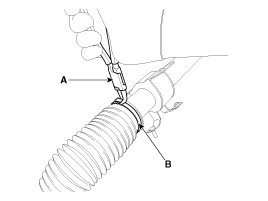
4. |
After making the space to the bellows and tie-rod end contact
part by using the (-) driver, remove the bellows (A) in the direction
of the arrow.(The left and right same work)
|
|
5. |
Remove the tie-rod & tie-rod end assembly (A).(The left and right
same work)

|
|
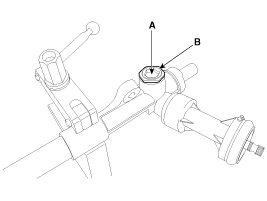
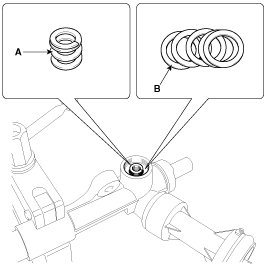
6. |
After fixing the yoke plug (A), remove the rock nut (B).
|
|
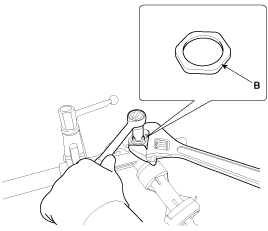
7. |
Remove the yoke plug (A).

|
|
8. |
Remove the yoke spring (A) and leaf spring (B).
|
|
•
Note that there may be urethane pads or back side
of O-ring in place of leaf spring.
|
|
•
The number of leaf spring can be differs from
depending on vehicle.
|
|
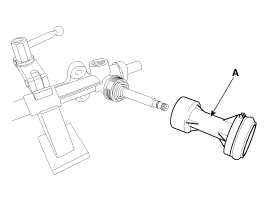
9. |
Remove the support yoke assembly (A) from the inner lack hosing.
|
|
•
In case of support yoke assembly (A), the number
and availability of O-ring can differ from depending
on vehicle.
|

|
10. |
Remove the dust packing & cap (A).
|
|
11. |
Remove the top plug (A) by using the spanner.
|
|
•
When removing the top plug, top plug is made of
aluminum, so be careful to avoid distortion.
|


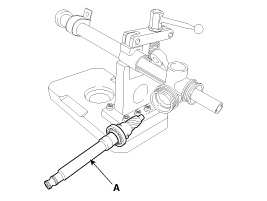
|
12. |
Remove the pinion assembly (A).
|
|
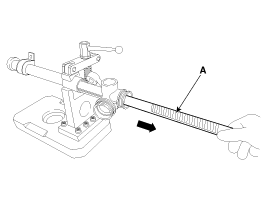
13. |
Remove the rack bar (A) in the direction of the arrow.
|
1.
Remove the front wheel & tire.
Tightening torque :
88.3 ~ 107.9N.m(9.0 ~ 11.0kgf.m, 65.1 ~ 79.6lb-ft)
...
1.
After spreading grease on the rack bar gear part (A), install
rack bar (B) in the direction of the arrow.
...
See also:
AVN Head Unit Installation
AVN Head Unit
1.
Connect the AVN head unit connectors and cable.
2.
Install the AVN head unit.
3.
Install t ...
Rear Wheel Speed Sensor Removal
1.
Remove the rear wheel and tire.
Tightening torque:
88.3 ~ 107.9 N.m (9.0 ~ 11.0 kgf.m, 65.1 ~ 79.6 lb-ft)
...
Ignition Switch Assembly Inspection
1.
Disconnect the ignition switch connector (B) and key switch connector
(A) from under the steering column.
2.
Check for continui ...


 Steering Gear box Replacement
 Steering Gear box Reassembly