 Kia Rio: Steering Gear box Reassembly
|
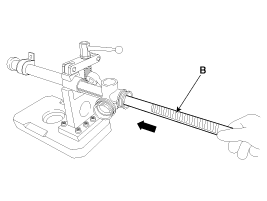
1. |
After spreading grease on the rack bar gear part (A), install
rack bar (B) in the direction of the arrow.
|
|
•
When inserting the rack bar, be careful not to
damage to inner rack housing.
|

|
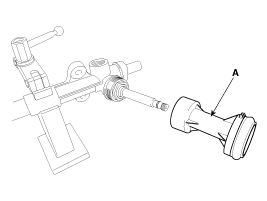
2. |
After spreading grease on the pinion gear part, install the pinion
assembly (A).

|
|
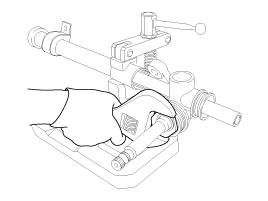
3. |
After spreading three bond (Loctite) on the top plug (A) thread,
install the top plug by using the spanner.
|
|
•
When installing the top plug, top plug is made
of aluminum, so be careful to avoid distortion.
|

|
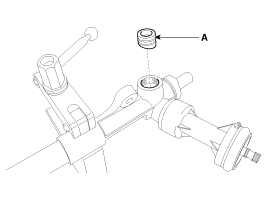
4. |
Install the dust packing & cap (A).
|
|
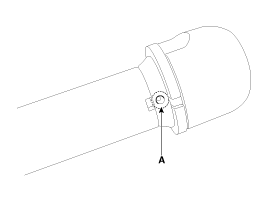
5. |
Install the support yoke (A).
|
|
•
Before installing the support yoke assembly, make
sure to whether the O-ring damage.
|
|
6. |
Install the Yoke plug (A) and leaf spring (B).
|
|
•
The number of leaf spring can differ from depending
on vehicle, pay attention to direction.
|
|
•
Direction of leaf spring

|

|
7. |
After spreading three bond (Loctite) on the Yoke plug (A) thread,
install the Yoke plug.

|
|
8. |
Adjust Yoke with reference to the “How to adjust Yoke”.(Refer
to "Steering gear box(Adjustment)" in ST group)
|
|
9. |
After fixing the yoke plug, install the rock nut (A).

|
|
10. |
Install the tie-rod & tie-rod end assembly (A). (The left and
right same work)


|
|
11. |
Caulk (A) the rack bar and tie-rod assembly joints. (The left
and right same work)
|
|
•
When you doing caulking, use the air tool or chisel.
|

|
12. |
After spreading sealant on the rack hosing and the bellow joints
(A), install the bellows (B) in the direction of the arrow.

|
1.
Fix the steering gear box assembly (A) on the vice.
2.
Remove the bellows clip (A) in the direction of the arrow. (The
left and ...
See also:
Yaw-rate and G Sensor Removal
1.
Turn ignition switch OFF and disconnect the negative (-) battery
cable.
2.
Remove the front seat (LH) assembly.
(Refer to the Bo ...
Input Speed Sensor Specifications
▷ Type: Hall effect sensor
Operation condition [°C(°F)]
((-)40 ~ 150)) -40 ~ 302
Air gap(mm)in.
(1.2 ~ 1.8)
0.0472 ~ 0.0709
Output volta ...
Installation
•
Install the component with the specified torques.
•
...

 Disassembly
 Restraint