Kia Rio: Fuel Filter Replacement
1. |
Remove the fuel pump (Refer to “Fuel Pump” in this group).
|
2. |
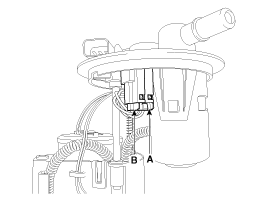
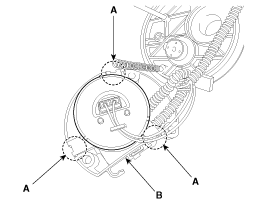
Disconnect the electric pump wiring connector (A) and the fuel
sender connector (B).
|
3. |
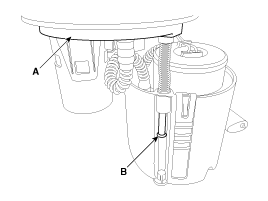
Remove the head assembly (A) after releasing the cushion fixing
clip (B).
|
4. |
Disconnect the fuel tube quick-connectors (C).
|
5. |
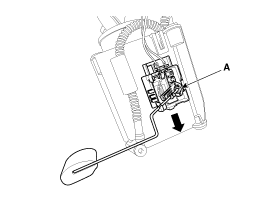
Remove the fuel sender (A) in the direction of an arrow.
|
6. |
Disconnect the fuel tube connector (A).
|
7. |
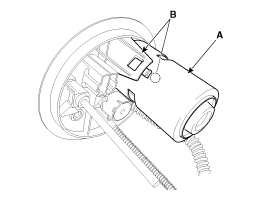
Remove the cut valve (A) after releasing hooks (B).
|
8. |
Remove the reservior-cup (B) after releasing the fixing hooks
(A).
|
9. |
Release the fixing hooks, and then remove the pre-filter (A) and
the fuel pressure regulator (B).
Be careful of O-ring.
|
10. |
Replace new fuel filter.
1. Head Assembly
2. Electric Pump Motor
3. Fuel Filter
4. Fuel Sender
5. Fuel Pressure Regulator
6. Pre-filter
7. Reservoir cup
|
[Fuel pump]
1.
Turn ignition switch OFF and disconnect the negative (-)battery
cable.
2.
Remove the fuel pump assembly.
...
1.
Open the fuel filler door, and then remove the filler-neck assembly
mounting screws (A).
2.
Disconnect the fuel filler hose (A) ...
See also:
Component Location (1)
1. Head lamp (Low/ High)
2. Head lamp (Low)
3. Head lamp (High)
4. Turn signal lamp
5. DRL/ Position lamp
6. Side marker lamp
7. Turn signal lamp (Door mirror)
8. F ...
Transaxle Control Module (TCM) Installation
1.
Installation is reverse of removal.
In the case of the vehicle equipp ...
Tire pressure monitoring system
(1) Low tire pressure telltale / TPMS malfunction indicator
Each tire, including the spare (if provided), should be checked monthly when
cold and inflated to the inflation pressure recommended by ...