 Kia Rio: Sunroof Adjustment
How To Initialize
|
1. |
Check that the glass has been installed.
|
| A.
Finished height adjustment.
|
|
2. |
Push the close switch. (Keep on pushing the switch)
|
| A.
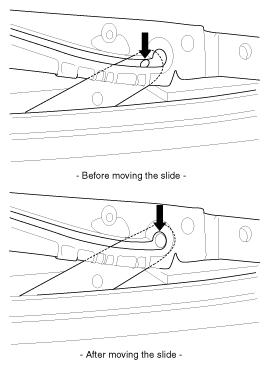
Press and hold the CLOSE button for more than 10 seconds
until the sunroof moves up to the tilt position.
|

|
3. |
Release the sunroof CLOSE button with in 3 seconds. And then press
and hold the CLOSE button once again within 3 seconds until the sunroof
do as follows;
|
| A.
Tilt up → Slide Open → Slide Close
|
|
4. |
Then release the lever.
|
|
5. |
When the sunroof is closed completely, turn OFF the UP switch
initialize the motor completely.
|
When To Initialize The Motor
|
1. |
After initial vehicle assembly.
|
|
2. |
If the initial value is erased or damaged because of short power
electric discharge during operation.
|
|
3. |
After using the manual handle.
|
Operating The Sunroof Emergency Handle
|
1. |
Use the sunroof emergency handle to close or open the sunroof
manually if the sunroof cannot be closed electronically due to motor
or controller electrical malfunction.
|
|
2. |
Operating method.
|
| A.
Remove the roof trim.
|
| B.
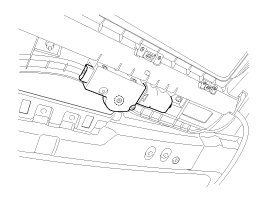
Push the emergency handle up into the hexagonal drive
(A) of the sunroof motor. You must push hard enough to disengage
the motor clutch; otherwise the emergency handle will slip due
to incomplete fit in the motor.
|
| C.
Carefully turn the emergency handle clockwise to close
the sunroof.
|
| D.
After closing the sunroof, wiggle the handle back and
forth as you remove the tool from the motor, to ensure the motor
clutch reengages.
|
| E.
A 5mm hex socket may be used in place of the emergency
handle, with a” Speeder” type handle.
|
|
•
Do not use power tools to operate the sunroof.
|
|
•
Damage to the components may occur.
|

Glass Replacement
•
Put on glove to protect your hands.
...
Outside Rear View Mirror Replacement
•
When prying with a flat-tip screwdriver, wrap it wit ...
See also:
Console Components
1 . Floor console assembly
2 . Console upper cover [M/T]
3 . Console upper cover [A/T]
4. Potable ash tray
5 . Parking brake cover
6 . Floor console pad
...
Circuit Diagram
(M/T)
(A/T)
...
Smart key unit Installation
Smart Key Unit
1.
Install the smart key unit.
2.
Install the smart key unit mounting nuts and connector.
3.
...
 Kia Rio: Sunroof Adjustment


 Sunroof Replacement
 Mirror Replacement