 Kia Rio: Compressor Inspection
|
1. |
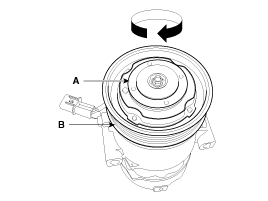
Check the plated parts of the disc & hub assembly (A) for color
changes, peeling or other damage. If there is damage, replace the clutch
set.
|
|
2. |
Check the pulley (B) bearing play and drag by rotating the pulley
by hand. Replace the clutch set with a new one if it is noisy or has
excessive play/drag.
|
|
3. |
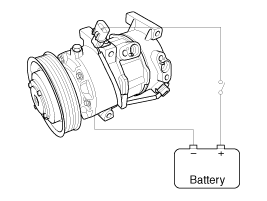
Check operation of the magnetic clutch.
Connect the compressor side terminals to the battery (+) terminal
and the ground battery (-) terminal to the compressor body. Check the
magnetic clutch operating noise to determine the condition.
|
| External Control Valve Compressor Inspection
(GDS) |
Compressor type: Fixed type compressor, External control valve, Internal
control valve.
In cases of fixed type and internal control valve, it is possible to inspect
compressor's operation with clutch noise.
When it comes to External control valve, however, it cannot be checked
in this way bacause it doesn't have a clutch.
So, ECV should be inspected with GDS as below.
|
1. |
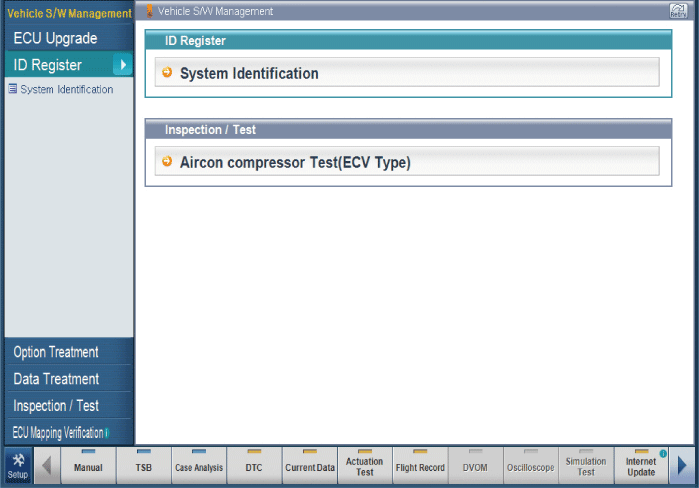
Connect GDS to the vehicle and select 'Aircon Compressor Test(ECV
type)'
[ECV1]
|
|
2. |
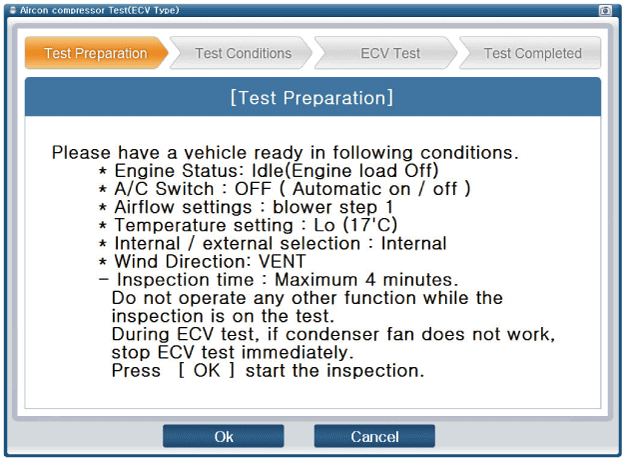
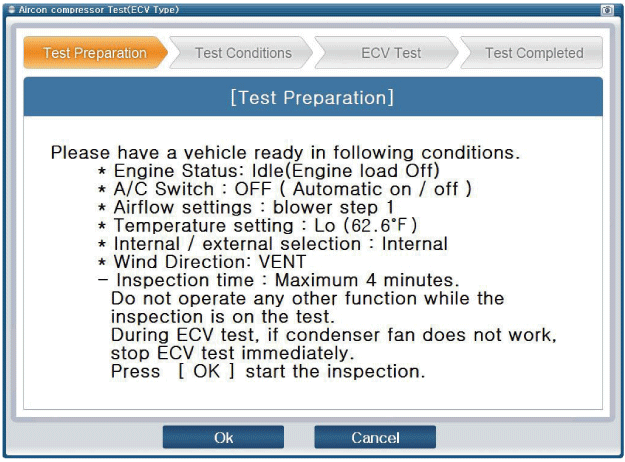
Make the vehicle ready as the GDS instruction on the monitor.
(Turn off A/C 'switch' only)
[ECV2]
[ECV3]
|
|
3. |
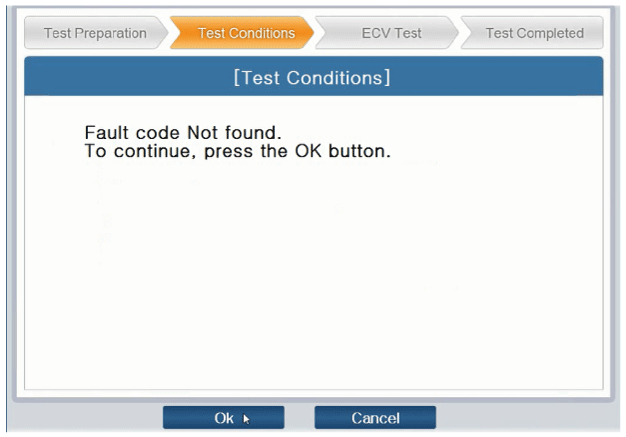
Check if other DTC codes are found before inspect ECV compressor.
If so, solve that problems first. If not, press 'OK' button to continue.
Do not continue inspection if these DTC codes are found:
B1241, B1242, B1672, B1685, B1686, B1687
|
[ECV4]
|
4. |
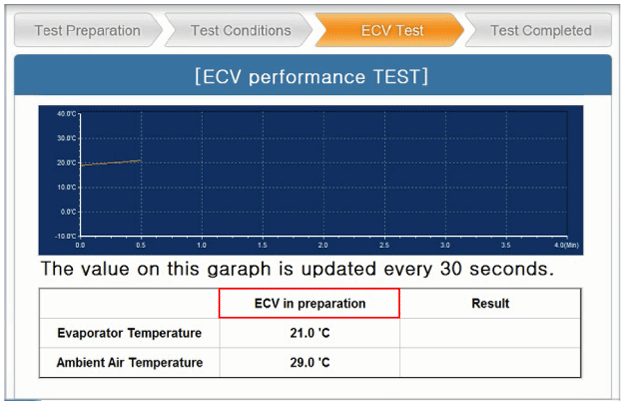
Start inspection
[ECV5]
[ECV6]
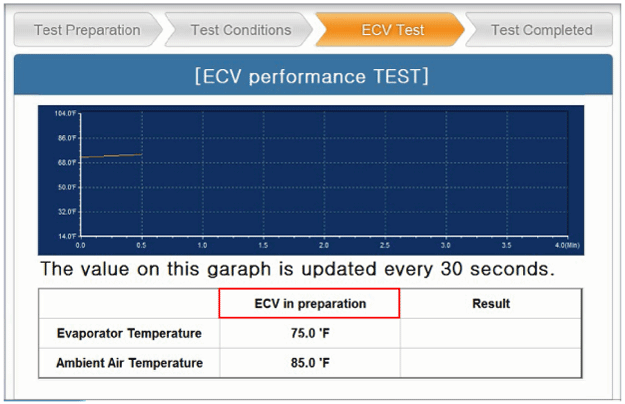
Check if condenser fan is operating when condition is
changed to 'ECV running'
|
Relife valve will be operated if a condenser fan doesn't
work because of overpressure in the compressor. It helps the
airconditiong system to relieve by releasing refrigerant and
oil. (Closed if relieved)
※ Refill refrigerant and oil after operation of Relife
valve
※ Noise occurred when Relife vlave is in operation
|
5. |
Check the result of inspection.
[ECV7]
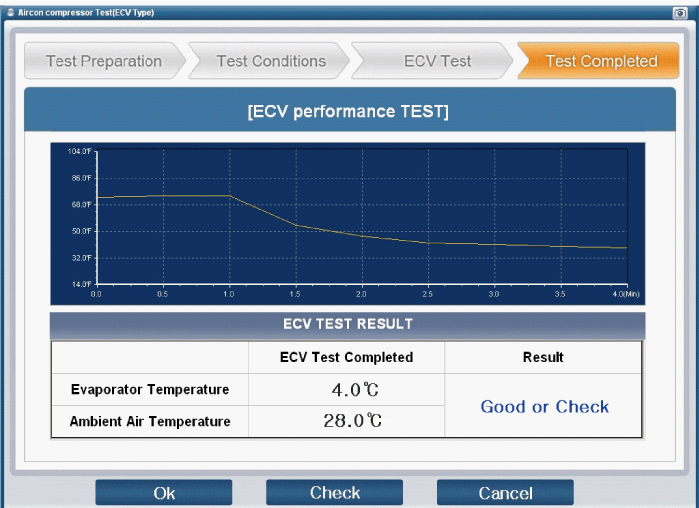
[ECV8]
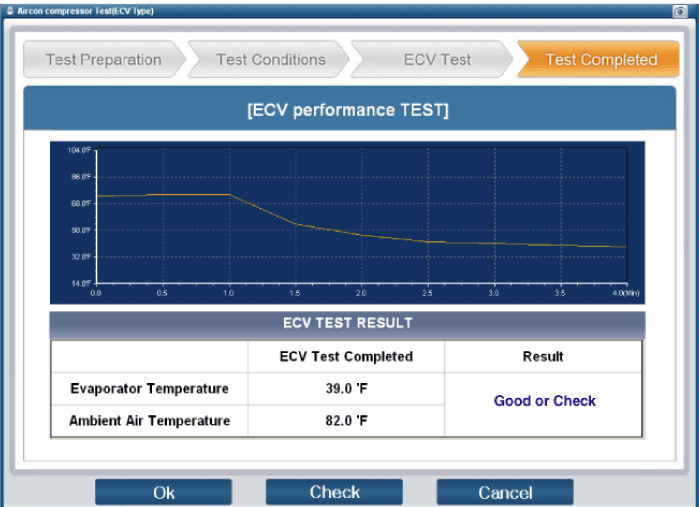
|
|
6. |
If the result shows "Check" , click "Check" and follow the instruction.
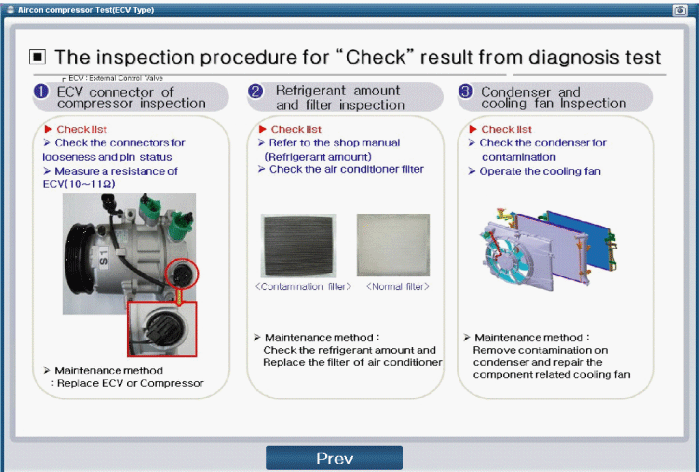
|
|
7. |
Inspect ECV again from the first step.
|
1.
Make sure of the length of compressor mounting bolts, and then
tighten it with the specified tightening order.
Tightening torque :
...
1.
Remove the RH front tire.
(Refer to SS group - “Front Tire”)
2.
Remove the engine room RH side under cover.
(Refer to EM grou ...
See also:
Components Location
1. Purge control solenoid valve (PCSV)
2. Vapor line
3. ORVR valve
4. Fuel tank air filter
5. Canister close valve (CCV)
6. Canister
7. Fuel tank pressure sensor ( ...
Sunroof Components
1 . Glass panel assembly
2 . Glass panel
3 . Reinforcement glass
4 . Encapsulated glass panel
5 . Wind deflector net assembly
6 . Wind deflector beam
7 . Plate cover [RH] ...
Specifications
Front Suspension
Item
Specification
Suspension type
MacPherson Strut
Shock absorber
Type
GAS
Coil spring
Free Heigh ...
 Kia Rio: Compressor Inspection


 Compressor Installation
 Compressor Disassembly